Filtering Quality Leads with Calendly Routing Forms
Jun 08, 2022
Introduction
If you're like most Calendly users, you rely on the app to schedule meeting with leads and clients in a seamless, hands-off fashion. And while your standard booking settings may be doing their job, there's a good chance you could be getting even more efficiency out of Calendly by using one of their newest and most-requested features: Routing Forms! In this post, we'll dive into what Routing Forms can do, and how to create one. Let's get started!
What are Routing Forms?
Calendly's new Routing Forms feature is a great way to filter qualified leads, as well as ensure that your leads and clients are directed to the correct meeting type. All of this can be accomplished through just a couple quick screening questions, and then some conditional logic (a favorite of ours here at Sphynx) to push people along the correct path. Admins on any of the Professional, Team, or Enterprise plans can create one of these forms in just minutes.
Let's say that you're a financial advisor who specializes in working with recent college graduates. To ensure that you're staying within your niche and servicing those whose situations you know best, you can create a routing form that asks a few questions such as, "How old are you?" and "When did you graduate college?". Based the lead's answers, you can then set up conditional routing logic that directs qualified leads to schedule a meeting with you, and directs non-qualified leads to a personalized "Thank You" page, or a link to a colleague's website that would better serve them.
You can also use routing forms to direct leads and clients to schedule a meeting with the correct team member or location. This can be especially useful for businesses that have different offices, or team members that each specialize in their own specific fields. Similar to the previous example, you can create a form with multiple choice questions about a lead's location and needs, and based on those answers, set up routing logic that directs that lead to the office closest to them, and with the team member that is best suited for their situation.
How to Create a Routing Form
As previously mentioned, creating a routing form takes no more than a few minutes, and is as easy as 1-2-3 - and I mean that literally! There are only three simple steps that you need to check off before your form is complete.
You can create a routing form by clicking on the "Routing Forms" tab on your Calendly homepage.
*Credit to Calendly for the following screengrabs!
Step 1: Add questions to your routing form.
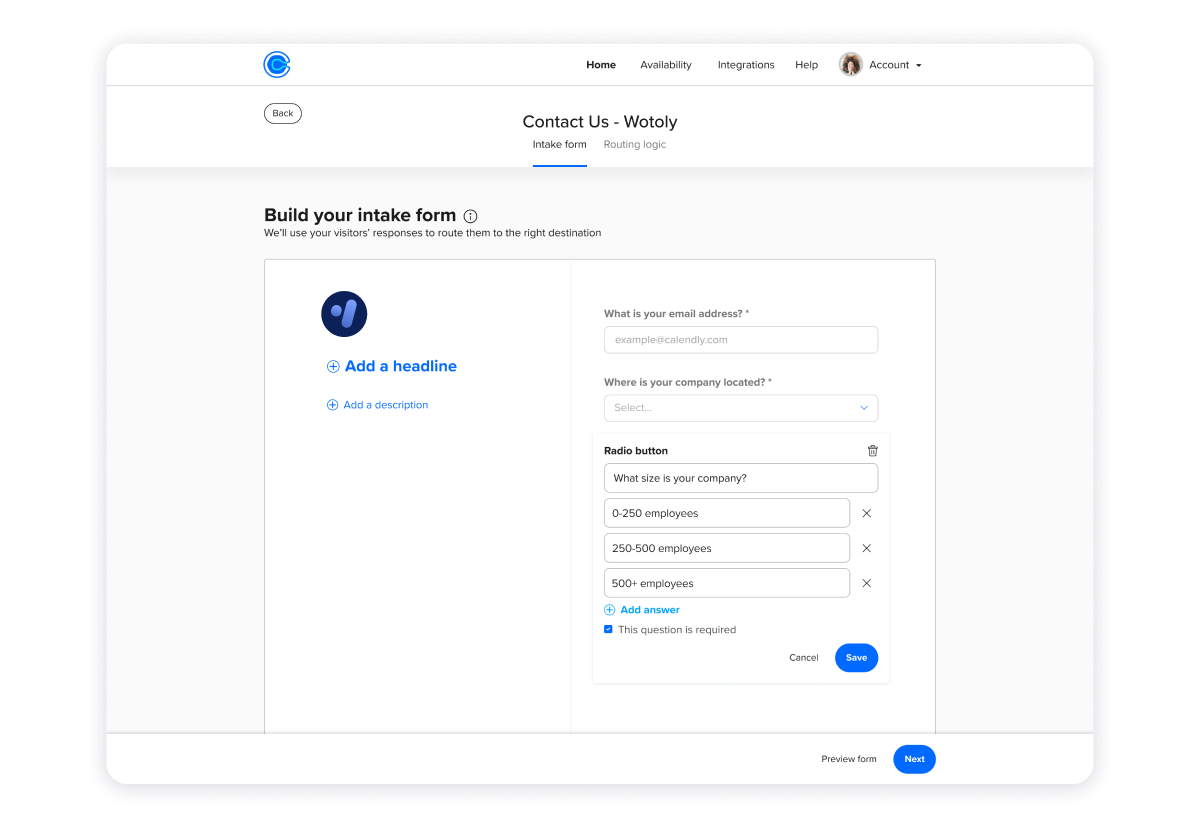
In this section, you have access to a variety of question types, such as short answers, dropdowns, and radio fields.
When it comes to adding questions to your routing form, less is more. Only ask your leads for information that will help direct them to the correct meeting, or define them as a qualified/non-qualified lead. Too many questions can overwhelm leads and make it feel like it isn't worth their time to schedule a meeting. After all, part of filtering quality leads is boosting your conversion numbers, so prioritizing a good client experience is imperative. And remember, if a lead is qualified, they'll have a chance to answer any questions you have attached to the meeting that they book!
Step 2: Set up your routing logic.
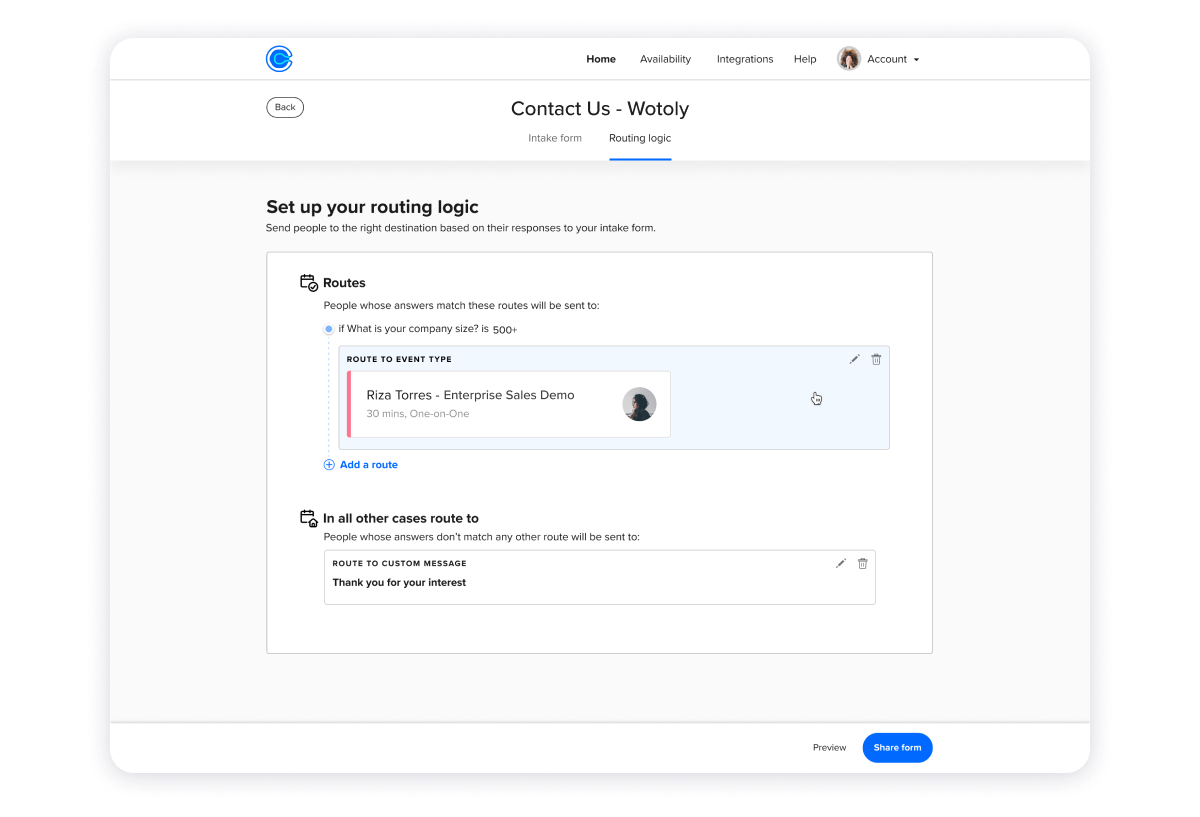
The word "logic" might seem daunting, but I promise you, it's much easier than it sounds. A simple way of looking at routing logic (and conditional logic in general) is "if this, then that". For example, "If a lead lives in New York City, then direct them to schedule a meeting at our Brooklyn location," or "If a lead needs a service we don't specialize in, then re-direct them to a link to our colleague that does." That's essentially all you're doing when setting up routing logic.
To do this, click "Add a route" and choose the answer that you want to use to trigger an action, such as sending the lead to the right meeting booking page. You can add multiple routes for different circumstances, and set up a general action that catches those whose answers don't fit the specific routes you've created. When you're satisfied with the logic you've created, click the "Preview" button, which leads to Step 3.
Step 3: Preview your Routing Form and test the routes you've created.
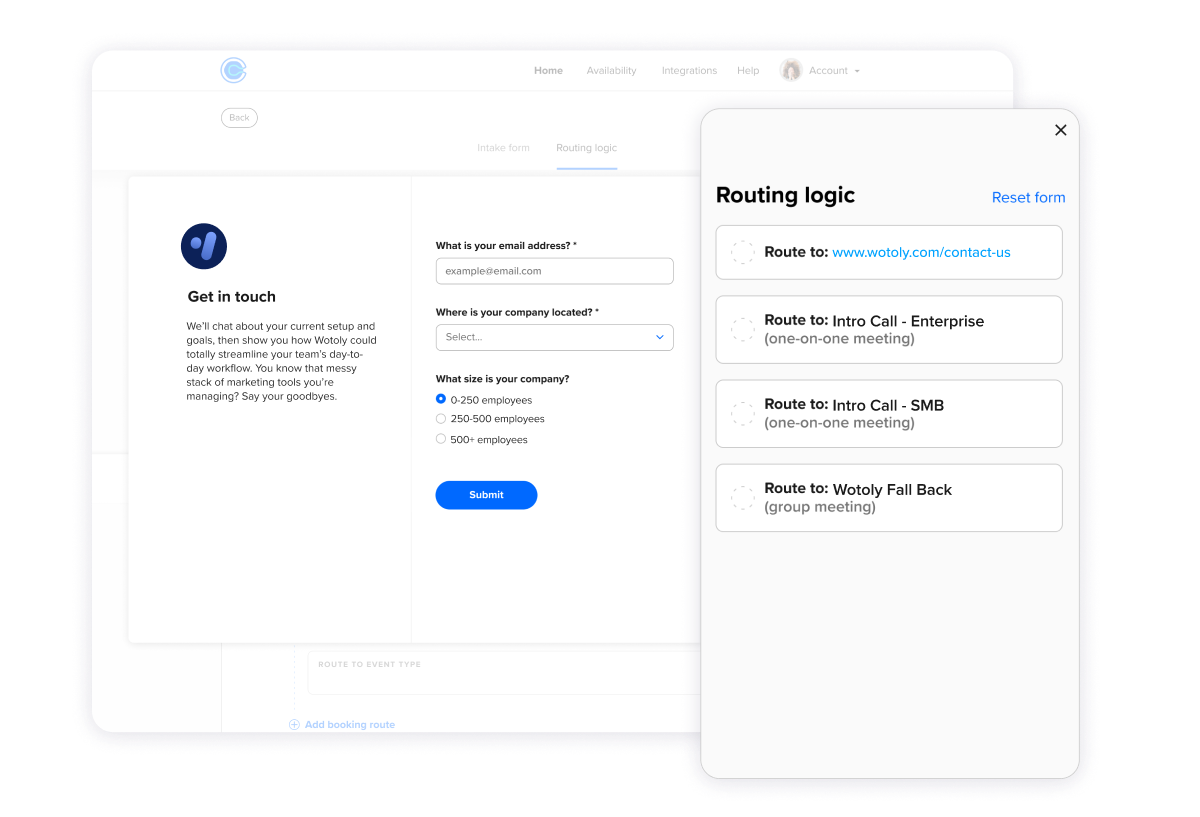
The third step is perhaps the most important one: testing what you've built.
Nothing ruins the client experience more than a system that doesn't work properly. Make sure to go through each of the possible routes you've made to ensure that they work as expected and direct leads to the correct places. Once you've tested what you created, hit the "Share Form" button to set it up for your team to share with leads and clients. You can also embed it directly onto your website!
If you know any Calendly users that haven't heard about or aren't using Routing Forms yet, tag them and let them know! It's bound to save them valuable time by eliminating wasteful meetings that they would otherwise be taking.
Conclusion
Calendly's Routing Forms feature is an amazing way to pre-qualify leads and make sure they're directed to the right meeting or link. It's simple to set up and only takes a matter of minutes to build a form that will help make your business more efficient. With quality leads being the only ones that reach your calendar, it won't take long before you're seeing better conversion numbers as a direct result of using it.
Thanks for reading this edition of the Sphynx Automation blog series. Be sure to tag a Calendly user you know who might benefit from this new feature, and if you haven't already, give it a try yourself!
Be on the lookout for our next post, which will come your way in late June!
We’re here to help! Email us if you have any questions.
This blog is written by the Sphynx Automation team to help DIYers use web-based apps.
Not a DIYer? Not a problem, click the button below to chat with us.
