3 New Features Added to Jotform Tables
May 10, 2024
Introduction
If you're a Jotform user who hasn't yet tried using Jotform Tables, you may not know exactly what it is.
Jotform Tables is Jotform's internal solution to utilizing spreadsheets. While you can also utilize one of Jotform's integrations with Google Sheets or Microsoft Excel, Jotform Tables requires no setup to start tracking data from submissions, greatly reduces entry errors, and keeps data all in one single platform. In addition, you can view data in a variety of formats, manually edit data if necessary, import existing data from CSV or Excel files, collaborate with team members, and so much more.
Just last month, Jotform added a trio of new features to Tables to boost your team's productivity. Users now have the ability to reset column connections to their forms, lock columns and filters, and download Jotform Sign documents, all from one place.
Let's take a bit of a closer look at what each of these new features entails.
Reset Columns
In Jotform Tables, every form element added to your form will have a corresponding column to track its submission data. These columns are named appropriately based on the element titles on the form. In the past however, when users attempted to add custom columns from within Tables, it would break the sync between form elements and columns.
While column names will still be reverted back to what they were originally, the Reset Columns feature will now maintain the sync between columns and form elements, making it easier for users to make manual edits to columns. Any custom-added columns will now all be located to the right-most side of the form.
To reset columns, click on the three dots on the right of the table tab. Upon clicking this button, you'll see an option called Reset Columns to Default.

When clicked, this will bring up a confirmation button that will reset all columns to their original configurations (when their synced element was added to the form).

Lock Column & Lock Filter
Working with collaborators on a project can be a great way to speed up the process, but we all know that all it takes is one misclick to create an issue that adds another hour to the project in an effort to fix it. Thankfully, the new additions of the Lock Column and Lock Filter options can greatly aid in limiting these types of slip-ups.
Let's say that your form contains a "Household ID" field in order to link submission data to a record in your CRM. You'll want to lock that field's respective column to ensure that the connection is maintained. To lock a column, click its "v" symbol on the right-hand side of the title, then click Lock Data in Column.

Once locked, you will see that the column in question has been grayed out and brandished with a padlock icon.

You can also lock columns in bulk by clicking on the Columns dropdown and clicking the padlock icon on each column you want to lock.

To implement a filter that conditionally limits the visibility of certain submissions, click on the Filter button to the right of the search bar. From here, customize your filter, lock it if desired by clicking the padlock, and press Apply Filter.

After your filter has been applied, you'll see that only submissions that meet the filter conditions show within your form's table.

Download a Jotform Sign Document (with or without an Audit Trail)
If you utilize Jotform Sign to streamline the signing process for documents with signature fields, you can now easily download a document of its kind in Jotform Tables, regardless of whether or not it has an audit trail.
For context, an audit trail is essentially a digital log that tracks the time and location of a signature, as well as who signed. This can be especially useful for easily determining where the ball was dropped or where an issue resides, along with simply having it for reference.
Downloading a Jotform Sign document is very easy, and you can do it in one of two places. The first will be via the Signed Document column. The green icon indicates no audit trail is included, while the blue icon indicates that your download will have an audit trail.
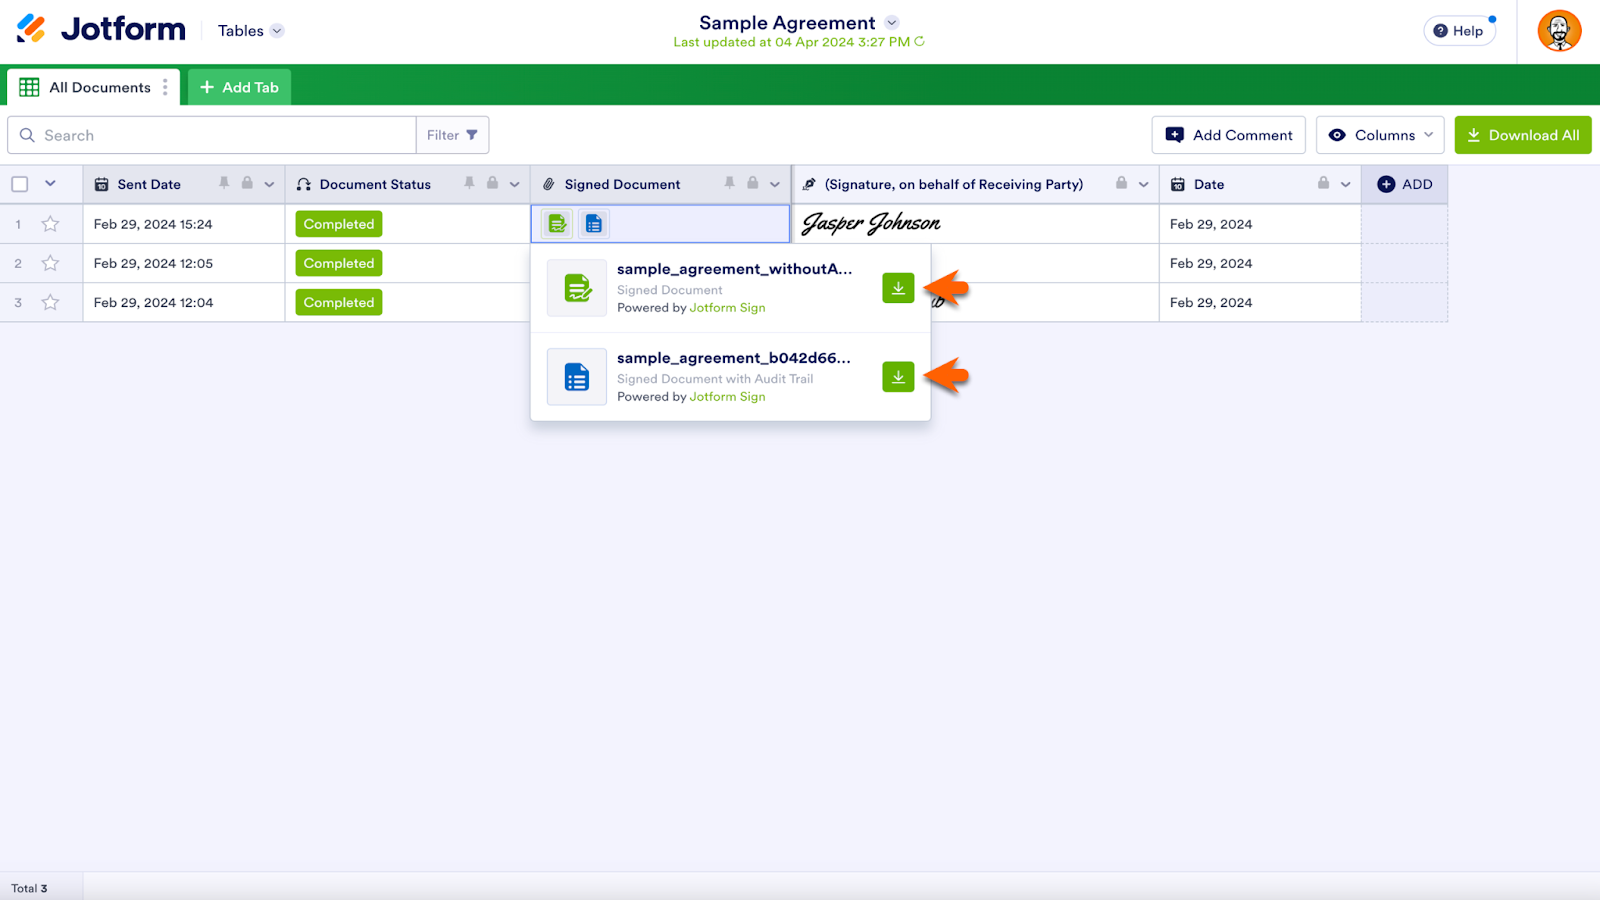
Image credit to Jotform.
The second way to download a Jotform Sign document is via the green Download button in the top right corner. You can either download all the documents at once, or check individual boxes at the start of submission rows before pressing the Download button.
As shown below, you'll also have a few different format options to download:
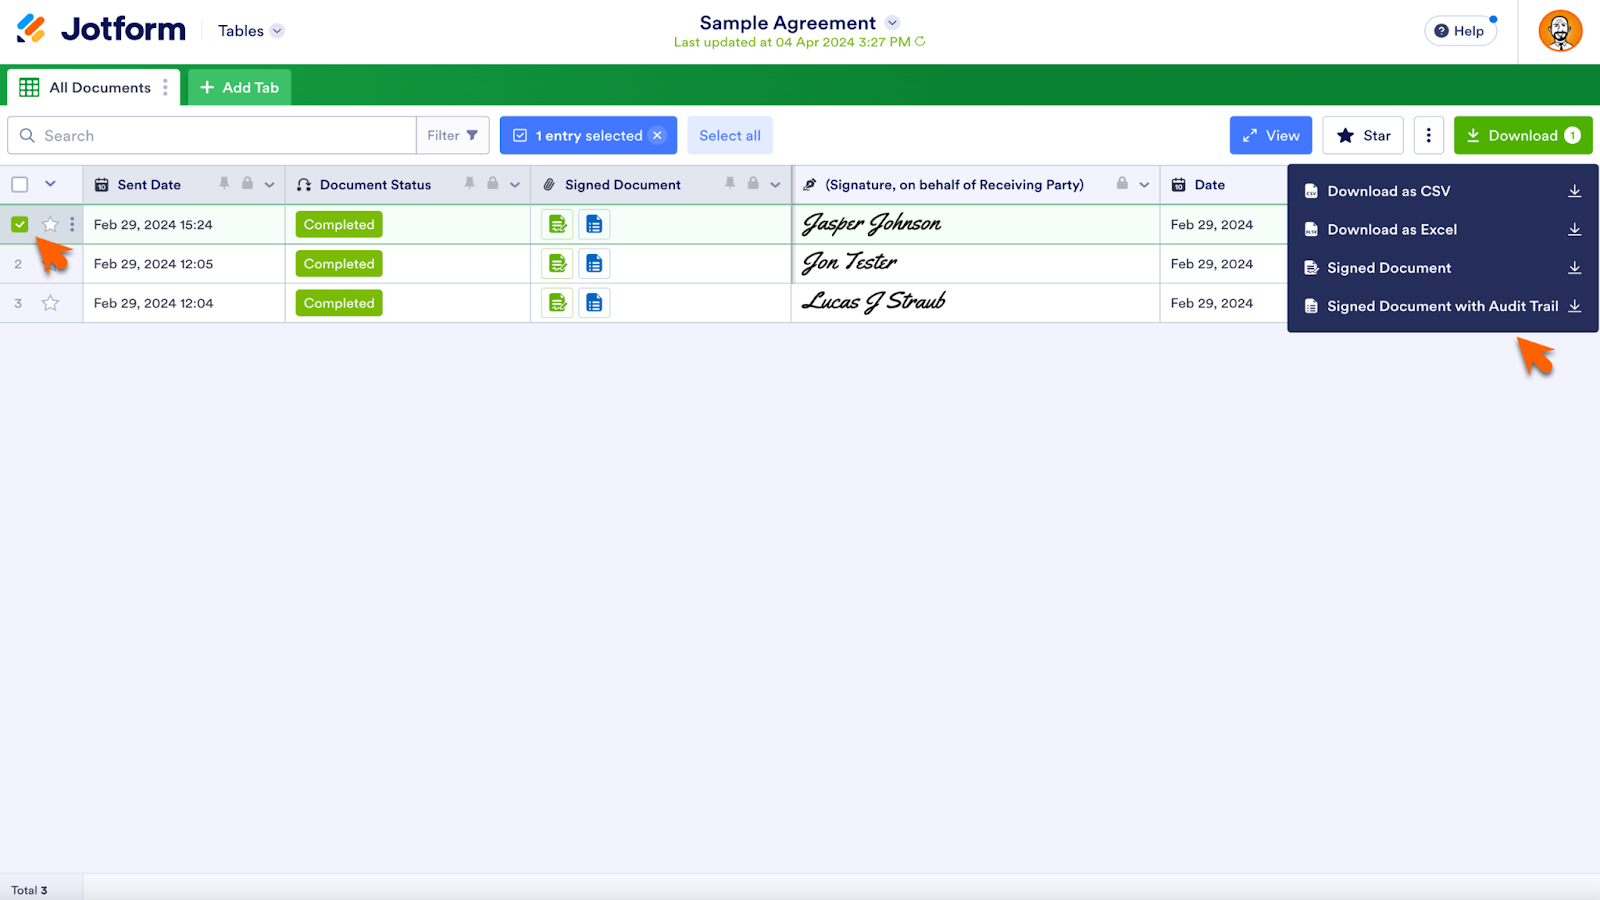
Image credit to Jotform.
Conclusion
Jotform's new updates to their "Tables" feature were created with team productivity in mind. When collaborating with others, a streamlined process is more important than ever to ensure that items aren't falling through the cracks, and time isn't being wasted. Thankfully with these new Jotform Tables features, you can make your Jotform Tables process more efficient than ever.
If you need assistance with Jotform tables or Jotform in general, you're in the right place! Book an intro call with us to learn how we can help!
Stay tuned as the summer rolls around, as we'll have more editions of the Sphynx Automation blog series headed your way!
This blog is written by the Sphynx Automation team to help DIYers use web-based apps.
Not a DIYer? Not a problem, click the button below to chat with us.
