Integrating a JotForm with Other Apps
Jun 09, 2021
Introduction
In this post we will cover integrating a form with other applications. Integration is the act of adding/connecting two or more items together. Whether we realize it or not, a plethora of items in our daily lives are the result of integration. Pants with pockets are the integration of sacks with clothing. Using Bluetooth features allows you to integrate your phone with your car. A standard desktop is a series of integrated peripherals that create the complete user experience. A hotdog or a hamburger is the perfect union or integration of meat and bread. This list goes on.
The purpose of integration in most cases is to make a seamless user experience, simplify a product or whatever the case may be. With most form builders, integration can be used to automatically track form submissions in a Google Sheet, add contacts to Mailchimp or Constant Contact as well as automatically store submissions in a Google Drive, Box or Dropbox Folder.
How to Integrate a JotForm
-
In the desired form, select “Settings” from the upper menu.
-
In the “Settings” screen, click “Integrations”.
-
Identify the integration you want to set up.
How to Integrate a Jotform with Google Sheets
Images from JotForm help section: https://www.jotform.com/help/228-How-to-Integrate-Forms-with-Google-Sheets#_
-
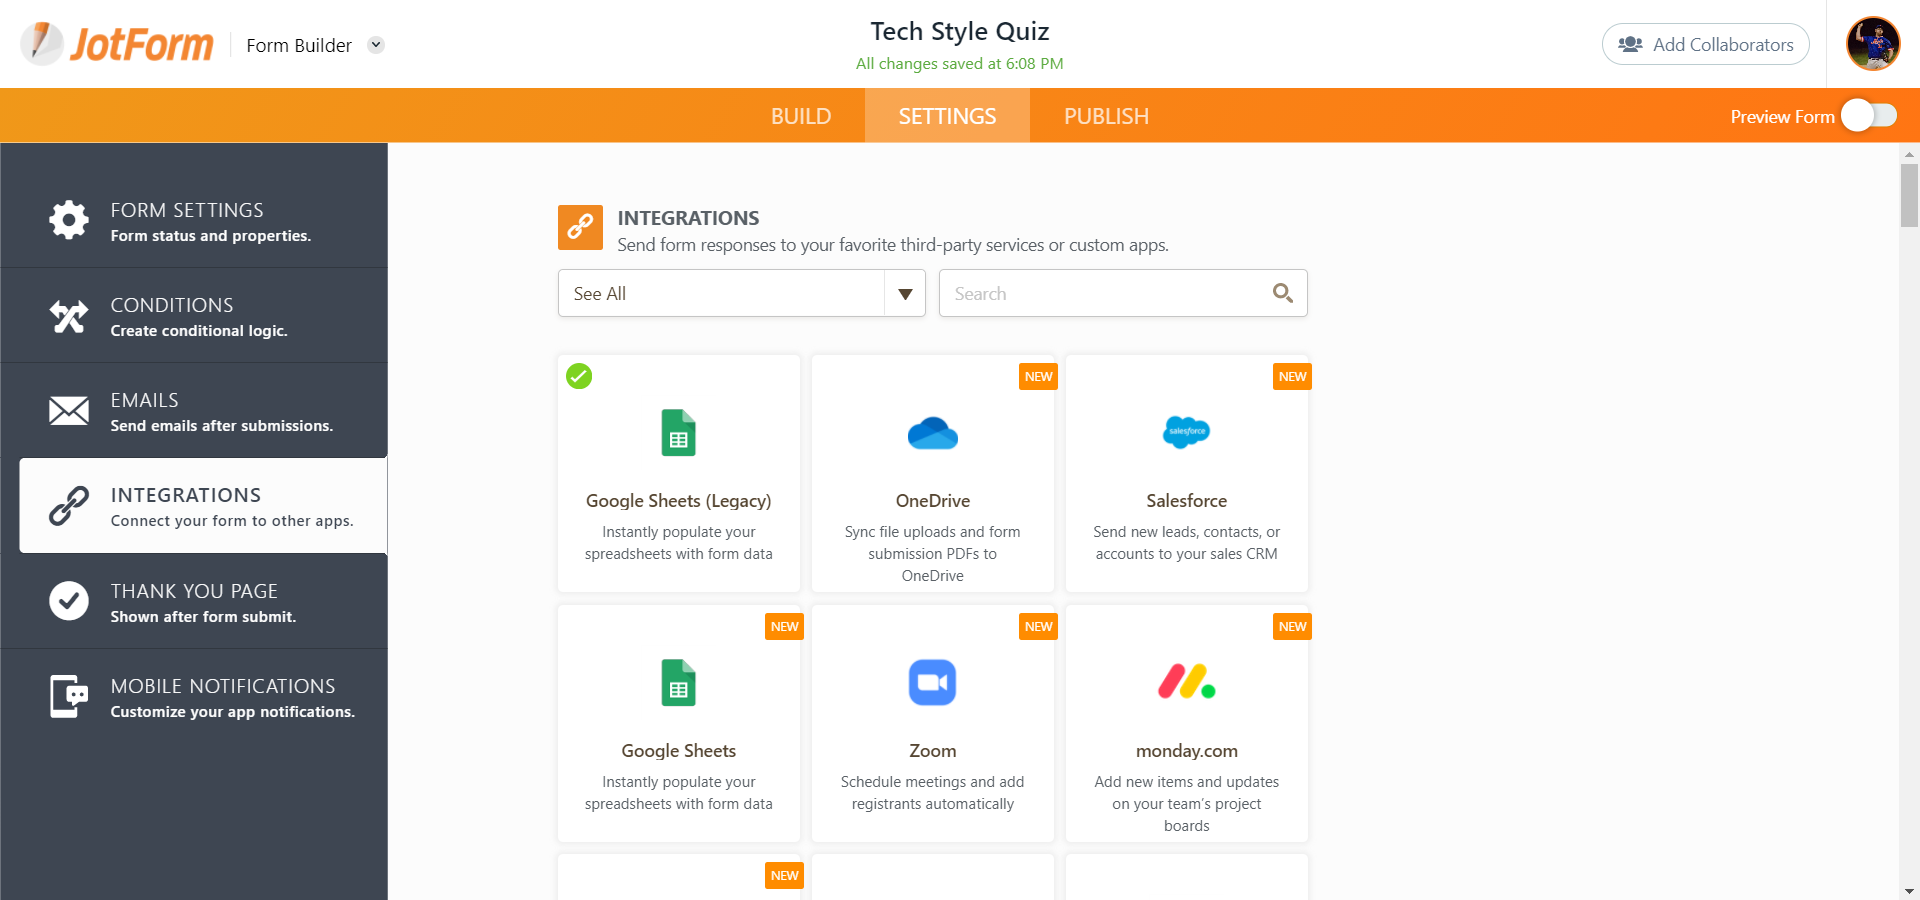
Click SETTINGS at the top.
-
Click INTEGRATIONS on the left.
-
Select Google Sheets

-
Click Authenticate
-
Complete the integration.
-
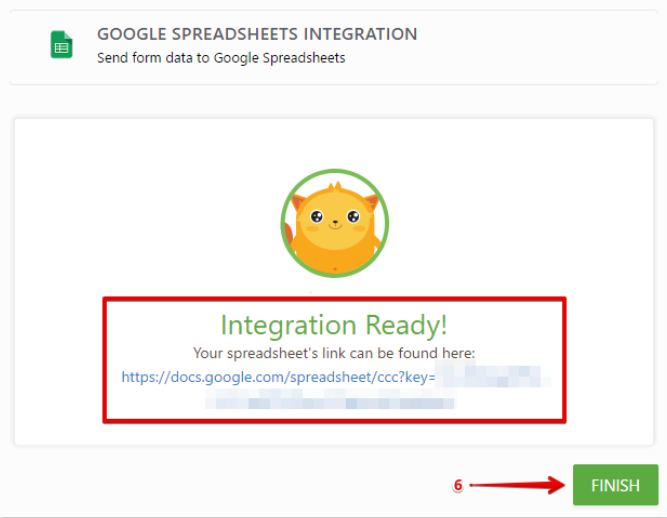
Click the link on the final screen to verify the connection and hit Finish.
How to Integrate a JotForm with Google Drive
The initial process for integrating your JotForm with Google Drive, Box, Dropbox, Egnyte and every other application, is nearly identical. You navigate to the integration screen, select your app and authorize your account. This is where the process differs from the form integration.
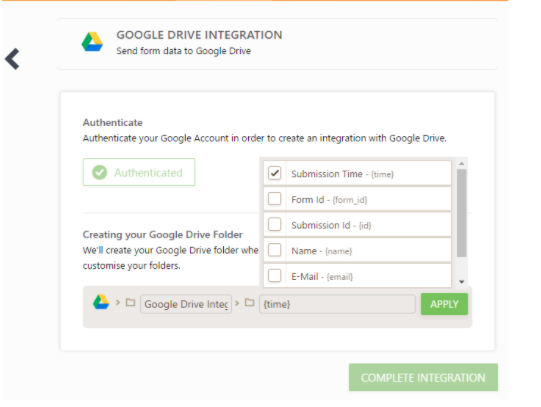
After connecting your account, you will be prompted to configure additional settings. In Google Drive, you can create a master folder for your form and then have each submission create a unique folder.
The fields on your form can be used to title the newly created folder. This integration makes it so that the client submission performs the backend administrative function of storing documents.
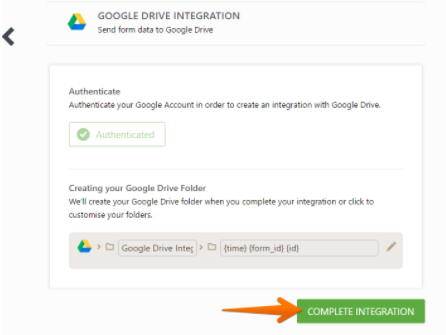
For example: Using our Tech Proficiency Analysis, we can create a parent folder called “Tech Proficiency Analysis Submissions.” Then, we can use any fields within the form, usually the name field, to title the unique folder containing the submission. This is especially helpful for forms that ask clients to upload documents, like our Document Needs List Generator. When the form gets submitted, all uploads will be in the unique client folder along with the PDF output of the submission. There are many other use cases for this feature. As you follow this blog, get creative and let us know what tips and tricks you’ve implemented to streamline your processes.
How to Integrate a JotForm with Mailchimp
The Mailchimp integration allows you to add new and existing submissions data to any of your audience lists and then segment them (based on form fields), for things like your Newsletter, Holidays, Topics of Interest and more.
Since Name and Email fields are required in the Mailchimp list, they must be included in your form. As mentioned in the previous post, it is crucial to ask for a name and email if you are utilizing any kind of autoresponder feature. The form needs to know who to address the autoresponder to and what email will receive the notification.
The process for setting up the integration follows the same steps as above:
Setting > Integrations >> Find App >>> Authenticate / Authorize Account.
*Note: JotForm does not store your login credentials for the other application. The authentication is to only get a key for the integration to work.
After authenticating your account:
-
Identify the form fields you want to send to MailChimp. These will be used to create the Mailchimp contact record when the form is submitted. Name, phone, email, marital status, favorite anime, favorite video game, birthday and anniversary are a few important ones.
*Note: Custom fields must be created in JotForm. This is a service we provide via White Glove Automation or Hourly Coaching. If you need assistance, please reach out to info@sphynxautomation.com.
-
(Optional) Configure Opt-in Email. Depending on your process and how you will use the form, it is recommended that you enable the Update Existing Contact option. Use the Add Existing Contacts to Mailchimp at your own discretion. The feature will add any previously submitted forms data to Mailchimp.

Up Next
In the next post, we will go through some quality of life tips in Gmail that could help you save time. If you found this helpful, like, comment and share. Chances are there are many people in your professional network that would benefit from this.
Also feel free to think of creative uses for forms: you could potentially design a scoring calculator for your children's efficiency and possibly create a Weekly Allowance Justification Form or a Total Screen Time Justification Form. Those are terrible, authoritative examples, but the possibilities are endless.
If you have any questions, feel free to ask. We’re here to help! Shoot an email to info@sphynxautomation.com or click here to see our form templates for sale.
Each of our forms includes a comprehensive video series on how to edit and use the form. For now, our forms are primarily used by Financial Advisors / Planners, Consultants and Attorneys. Purchasing the form will enable you to book a discounted Coaching Session with us to help you edit/modify the form for your specific needs if you need additional assistance.
This blog is written by the Sphynx Automation team to help DIYers use web-based apps.
Not a DIYer? Not a problem, click the button below to chat with us.
