How to Use Your Email Signature in JotForm Autoresponder Emails
Dec 08, 2021
Introduction
Hello fellow JotForm users! Do your autoresponder emails for clients not have that same personal touch that your normal emails have? Thankfully, there's a simple fix for that! In this post, I will take you through the steps on how to import and use your existing email signature in JotForm.
Note: This guide uses Google Chrome and Gmail to demonstrate. Other browsers and email applications may have a different process.
Extracting Your Signature
The first step is the most obvious one - logging into your email account. Once you're in, locate a message that you have previously sent with your desired signature.
After finding a message that you want to use, right click on your signature and select "Inspect". This will open up the inspector and allows you to view the coding on the back-end used to design the message. It should look something like this:

Next, use the top half of the inspector to locate the block of your signature. This code block will start with, "<div". I know this may seem overwhelming at first for those not used to working with code, but thankfully, the inspector makes it easy to locate. A light blue highlight will appear around the block that your mouse hovers over, like so:
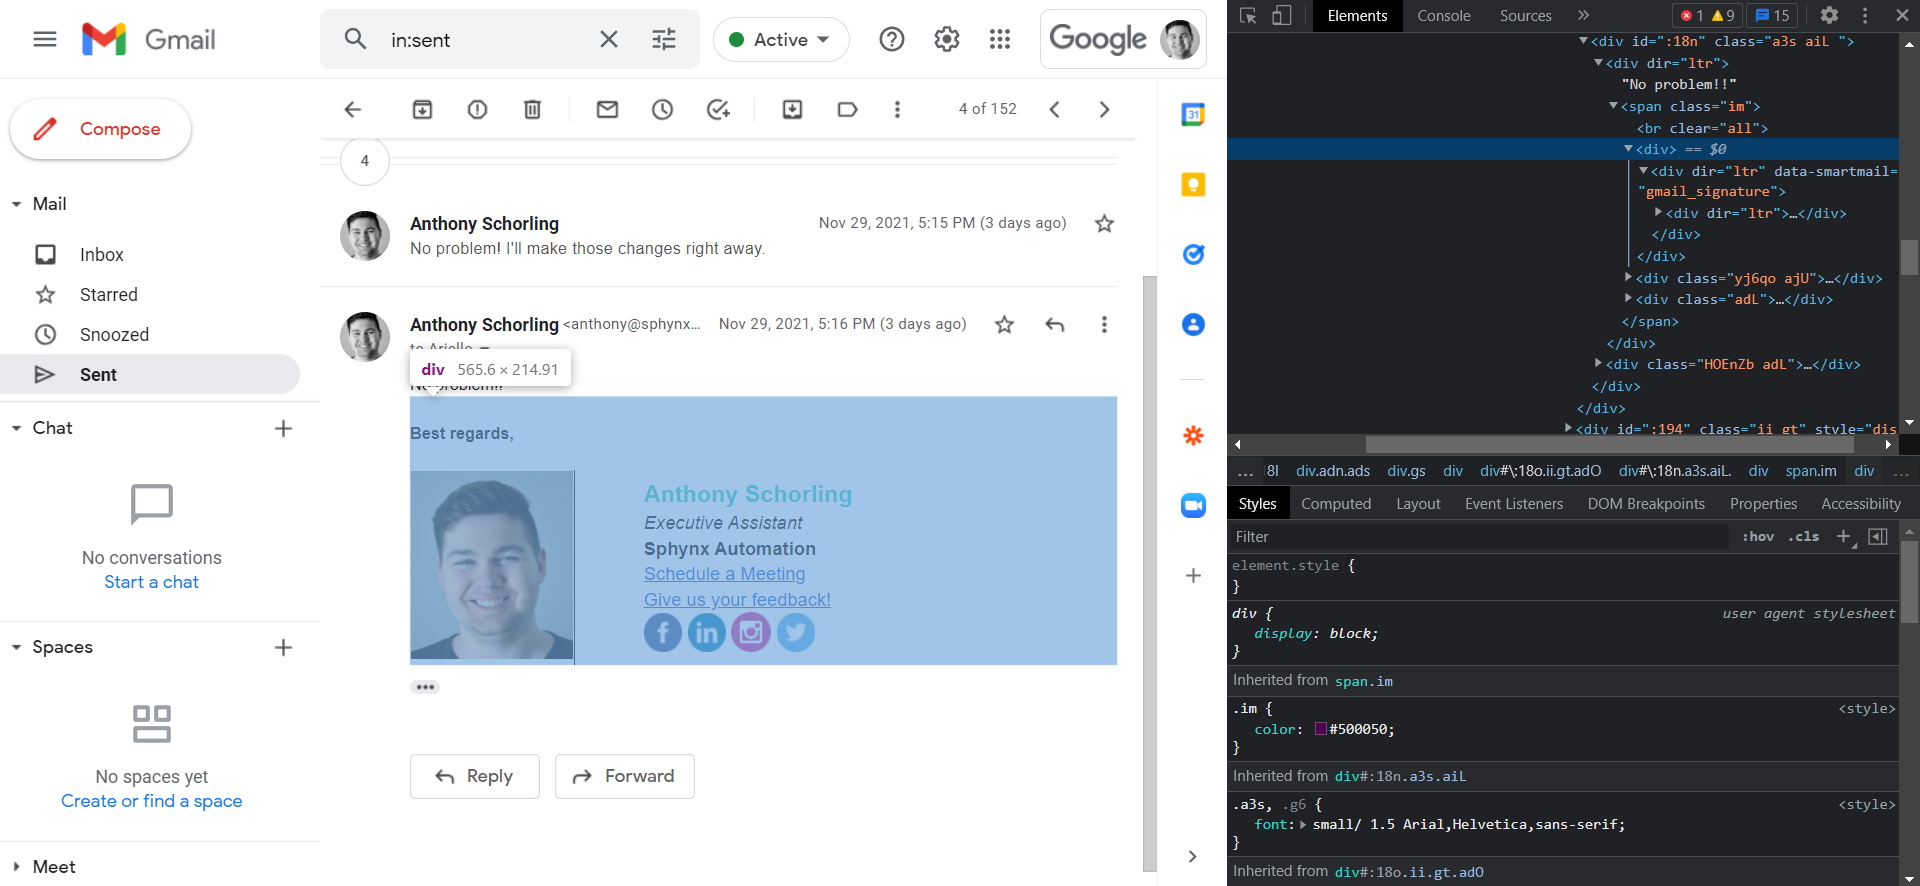
Once you locate the signature block, click on the line of code to focus on it. It will turn blue in the inspector once you do.
As shown in the above photo, you may also notice that there is a thin vertical line in the inspector. This is the inspector showing you where that block ends. We only want to extract the material that is inside the signature block, so the line can be very helpful as a guide.
Next, we're going to copy the outerHTML of the block so we can use it in JotForm. To do this, simply right click on the line of code you just clicked on, and select "Copy" > "Copy outerHTML".

Once it's copied, you can hit the "x" in the top right of the inspector to close it.
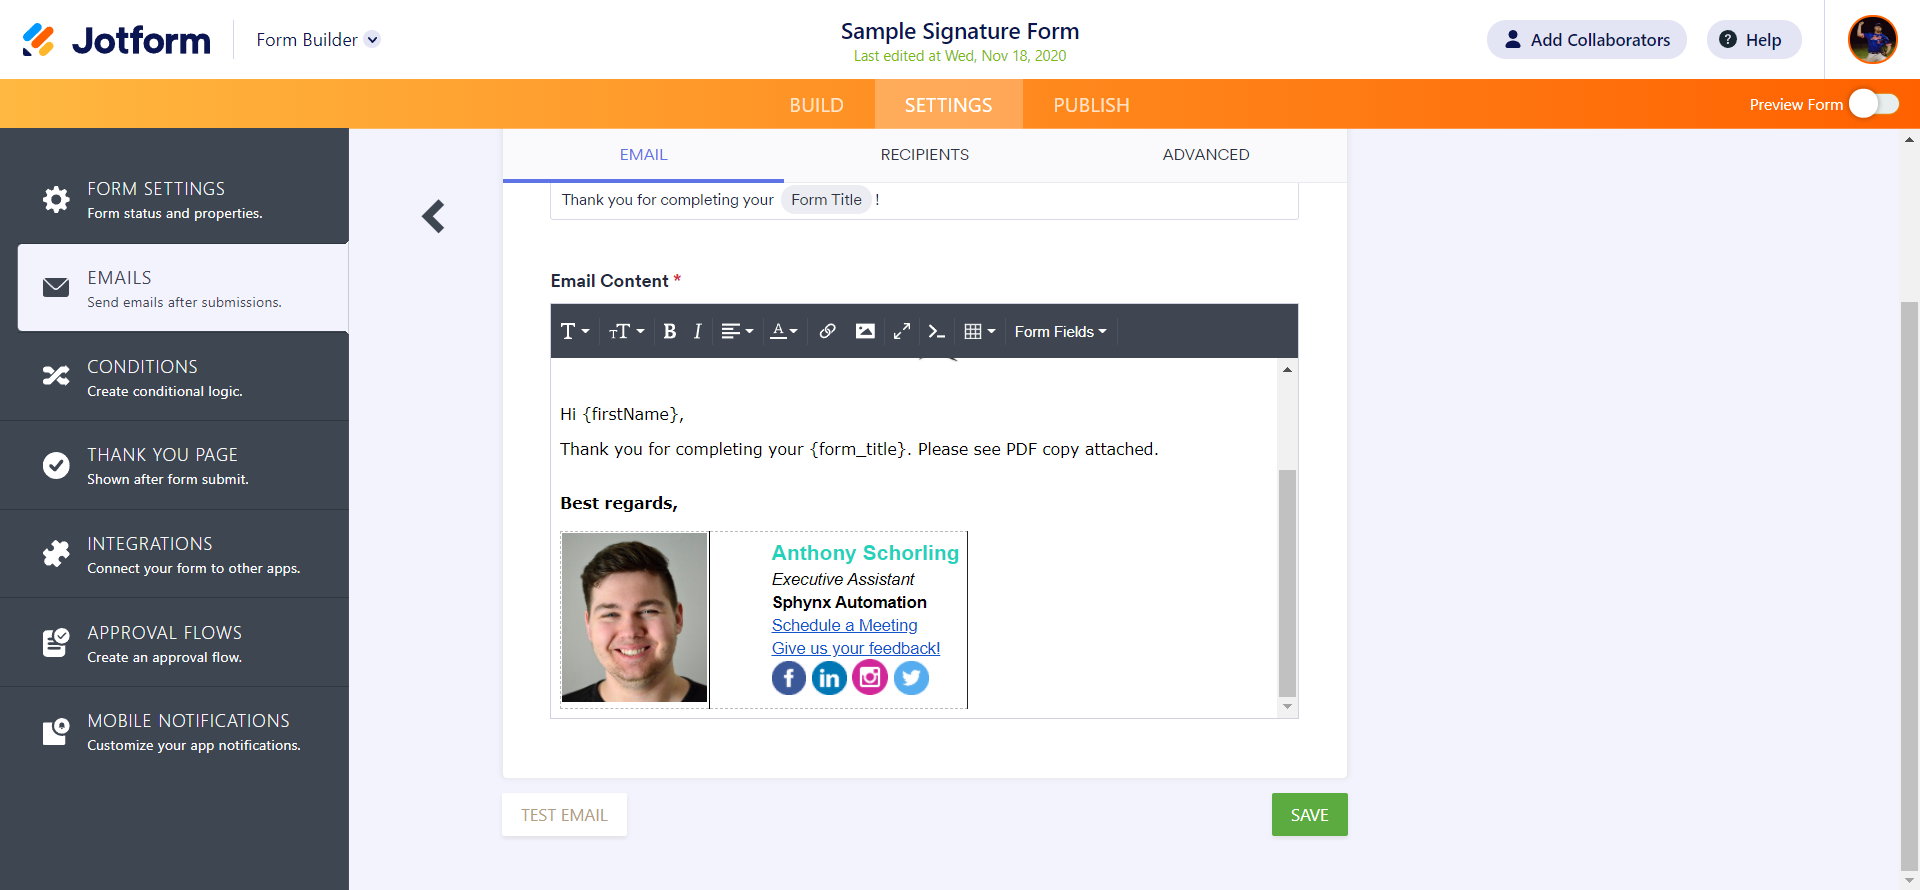
Pasting Your Signature into JotForm
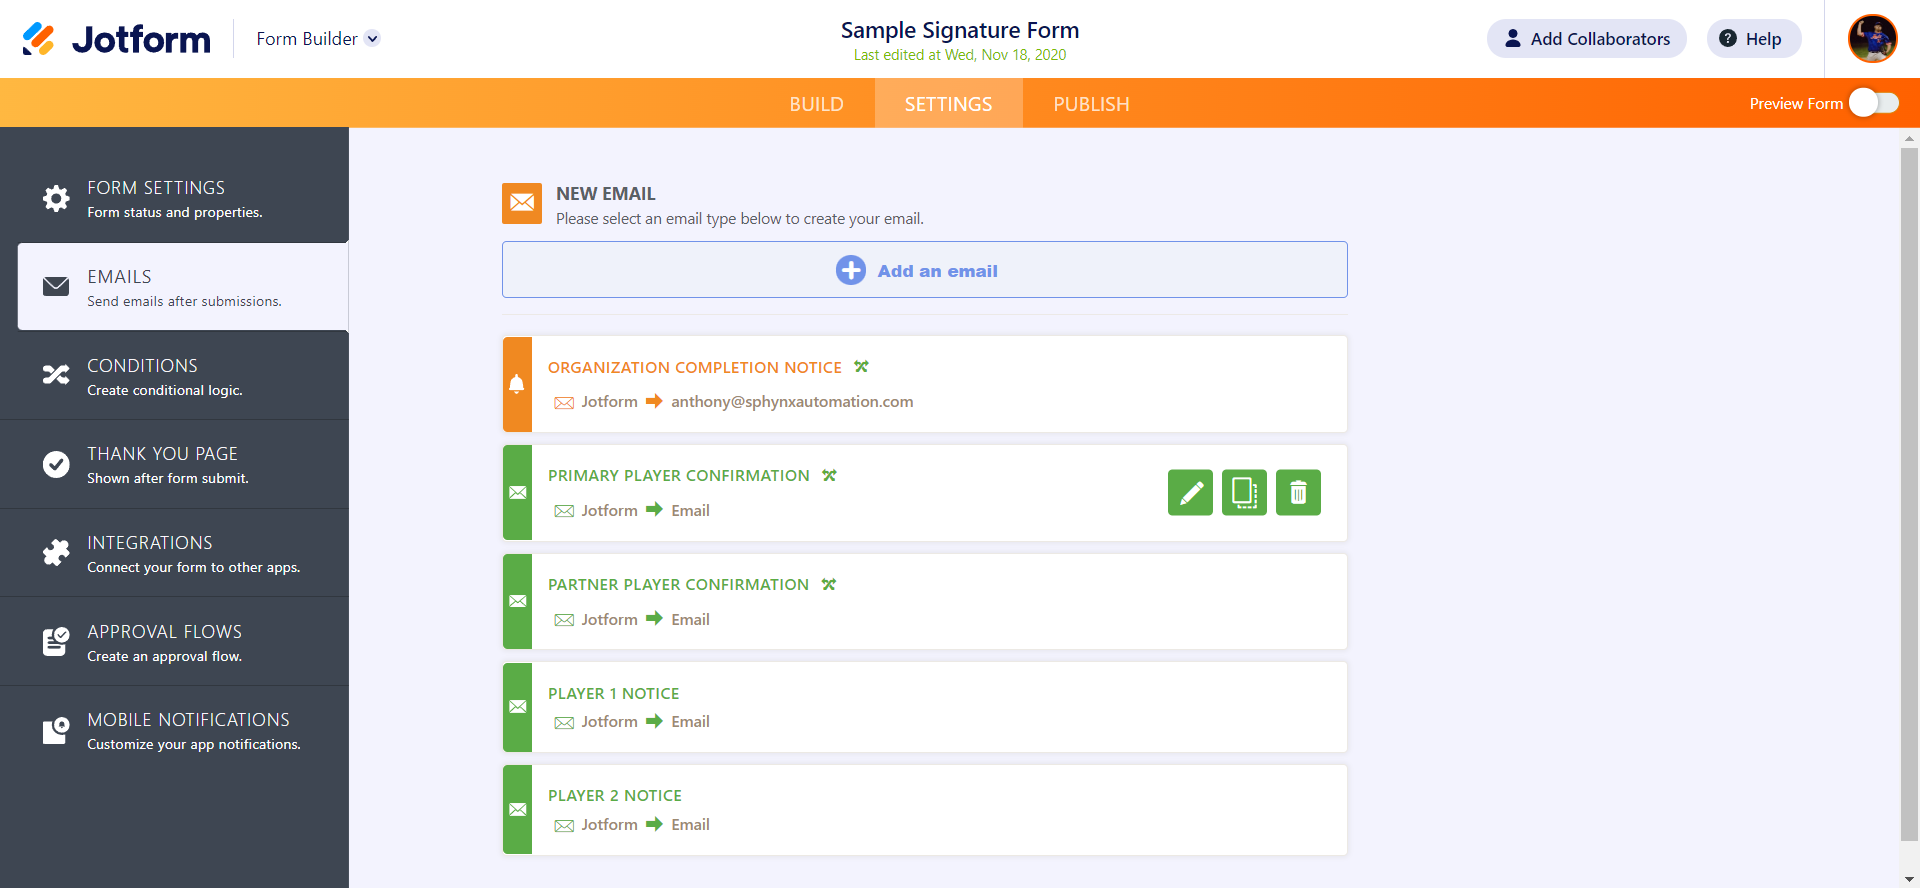
Congrats! You've made it past the hardest part. Now, log into your JotForm account, select your form, and navigate to your autoresponder emails located under the "settings" tab of the form. Then, click the edit (pencil) icon on the email autoresponder that you would like to add your signature to.
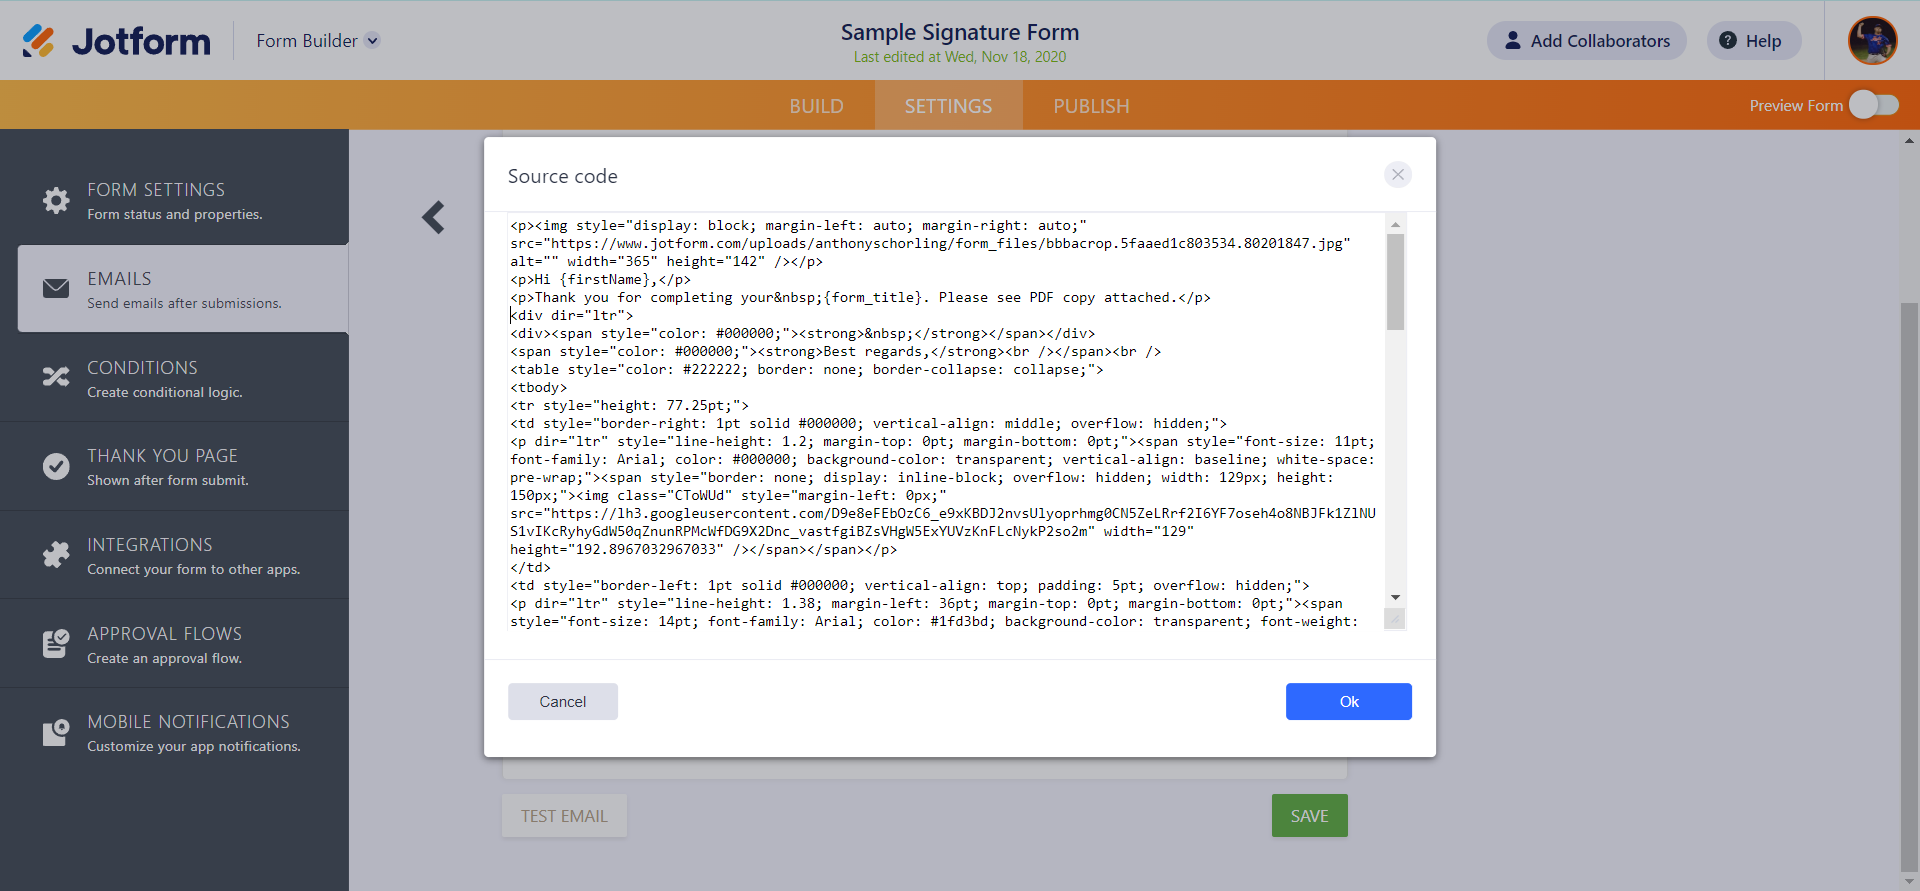
Next, click the ">_" icon on the top of the editor. This will allow you to edit the source code.

Almost done! In the source code editor, paste the outerHTML at the bottom of the existing code. Depending on the complexity of your signature, you may see more text appear than you expect, but don't worry - this is normal.
Finally, hit "Ok" and view your finished product. Just don't forget to click the green "SAVE" button!
Next Post
In this post, you learned how to take your existing email signature and extract it for use in JotForm. Now that all of your JotForm autoresponders have the personal touch that your standard emails have, give yourself a pat on the back. You're not only saving time by having JotForm automatically send out confirmations, reminders, and emails of the sort, but now it looks to your clients like those emails came directly from you!
If you found this helpful, please like, comment and share. Chances are, there are many people in your professional network who would benefit from this information, so don’t keep it a secret.
If you have any questions, feel free to ask. We’re here to help! Shoot an email to info@sphynxautomation.com or click here to see our form templates for sale.
Each of our forms includes a comprehensive video series on how to edit and use the form. While most of our forms are primarily used by Financial Advisors / Planners, Consultants and Attorneys there are some that are non-industry specific and the others can be customized further using our JotForm training courses. Purchasing the form will enable you to book a discounted Coaching Session with us to help you edit/modify the form for your specific needs if you need additional assistance.
This blog is written by the Sphynx Automation team to help DIYers use web-based apps.
Not a DIYer? Not a problem, click the button below to chat with us.
