Jotform Prefill 101
Feb 23, 2022Introduction
Last summer, Jotform announced a new quality-of-life feature called Jotform Prefill. In short, Jotform Prefill is an easy way to pre-populate forms with client data so your clients don't have to fill in that data again if they've already entered it somewhere else. Now, Jotform has announced Prefill 2.0, which is an expansion of Prefill's original features.
In today's fast-paced world where everything is at our fingertips, attention spans are shorter and patience has grown thinner. When one of your clients looks at the blank form you sent and sees questions they've already answered, they might give up on it and decide not to fill out that form altogether. That's a missed opportunity to get the additional data you need, all because of an inconvenience within your client experience.
While prefilling data in Jotform has been supported for awhile now, it wasn't always the easiest thing to do. Prior to Jotform Prefill's release, users would have had to manually map each field they wanted prepopulated using URL parameters. Users only prepopulating a couple fields likely wouldn't have too much trouble doing it this way, but when you need to pull mass amounts of data into a different form, this process becomes extremely tedious and easy to make mistakes in.
So how do you use Jotform's Prefill feature? Let's go over some of the ways you can set up your own prefills.
Note: The images used below are courtesy of Jotform.
All of these options can be accessed by locating the "Publish" tab on any of your forms, then clicking on the "Prefill" button on the left-side menu.
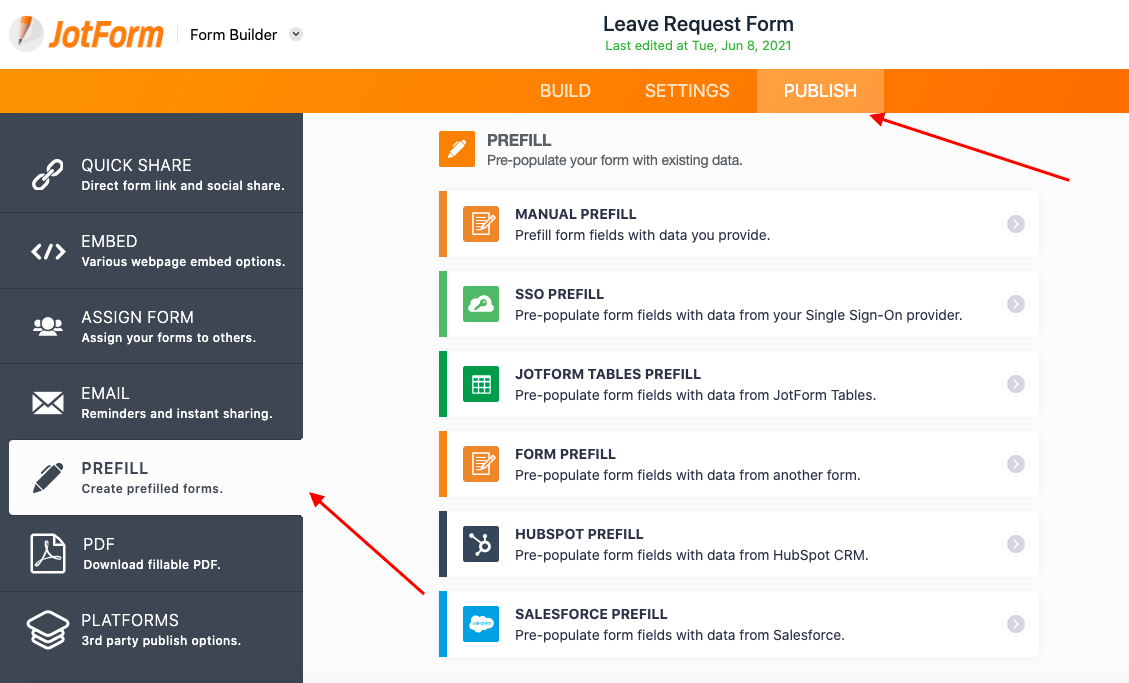
1. Manual Prefill
Manual prefill is the closest option to the old system, but much more simplified. In this case, the user simply enters the information they want prefilled themselves as if they were the client filling out the form. To do this, click on "Manual Prefill", and then "Create a Prefilled URL".
This should pull up a slightly different-looking version of your form, which looks like this:
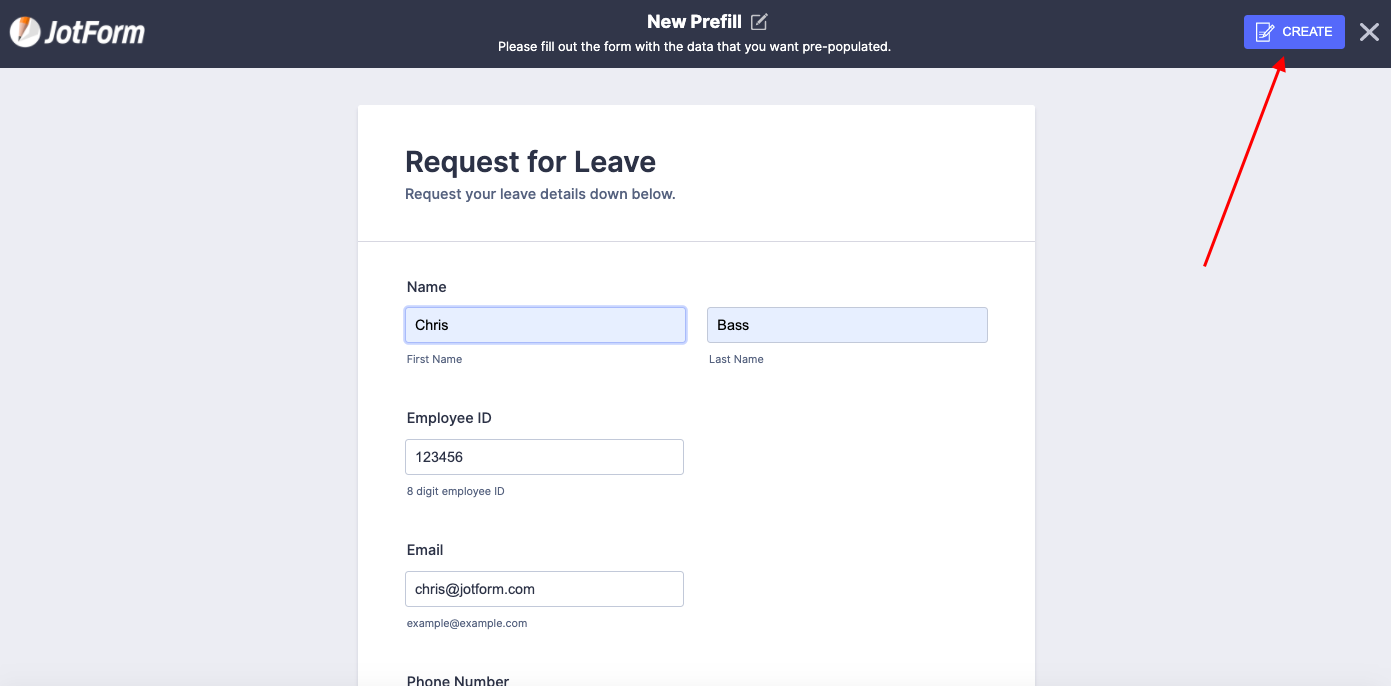
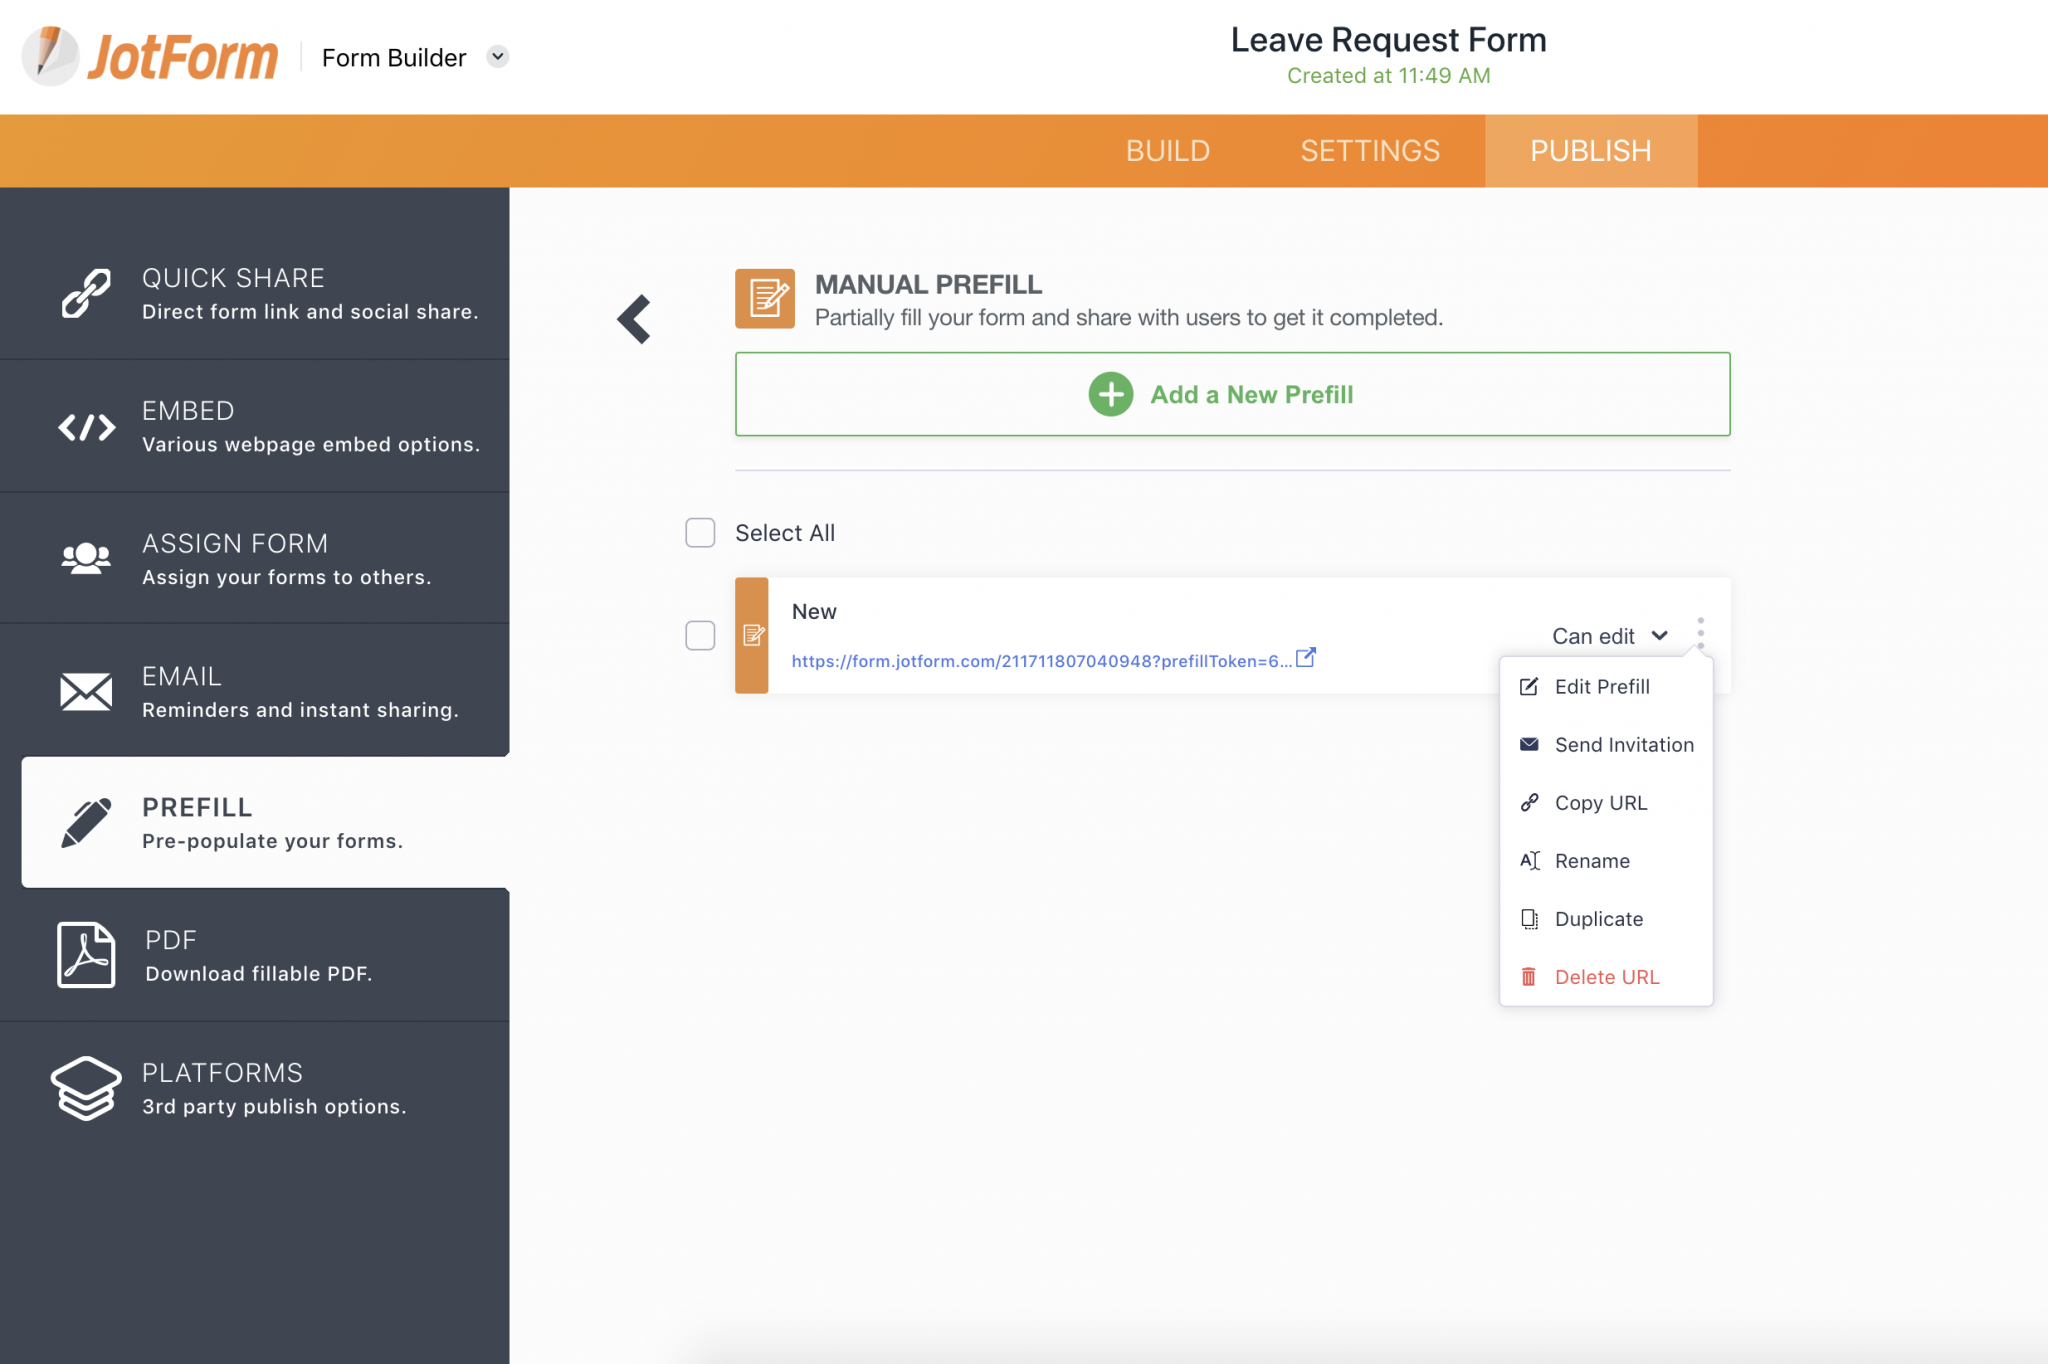
Once you've entered all of the information you want prefilled, hit the "Create" button in the top right corner to generate a URL for your prefilled form. It will display in the "Prefill" side menu under the publish tab, like so:
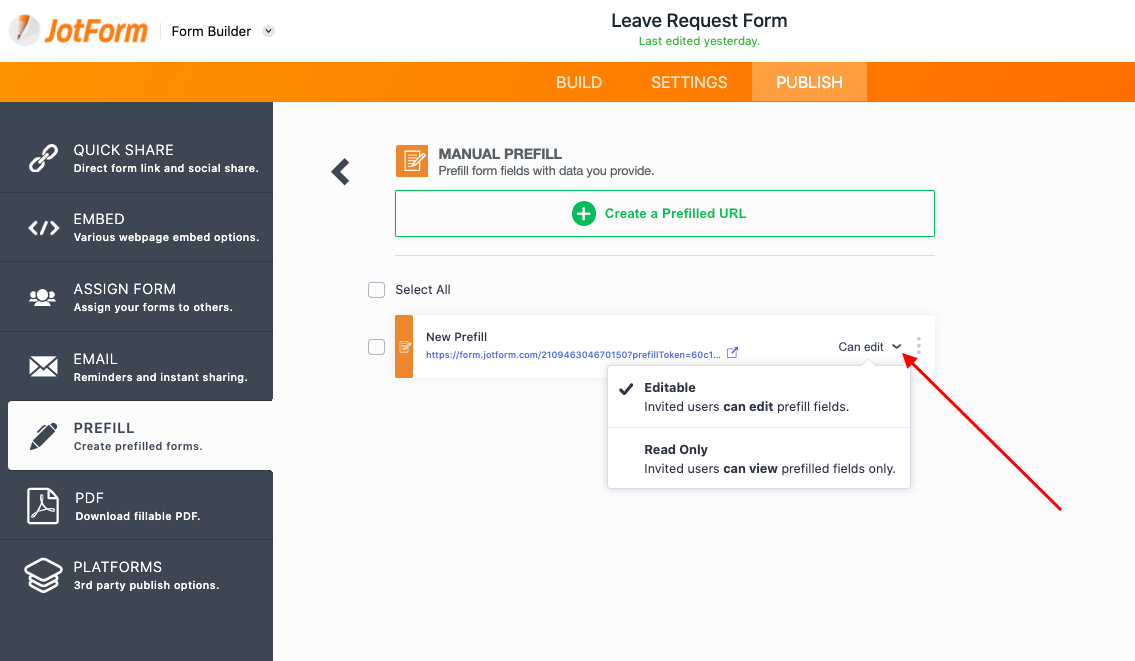
From here, you can change the editing permissions for invited users, and access the ability to edit the prefill, send it to clients, and more.
The manual prefill feature is best used for small businesses, or for one-off prefills. For prefilling forms on a recurring basis, one of the following options would likely be a better choice.
2. Jotform Tables Prefill
If you're a Jotform Tables user, this prefill option is for you.
You can now take data from previous form submissions stored in Tables and use it to prepopulate your forms. To do this, you'll access the Prefill option the same way as you would with a manual entry, except that this time you'll select "Jotform Tables Prefill".
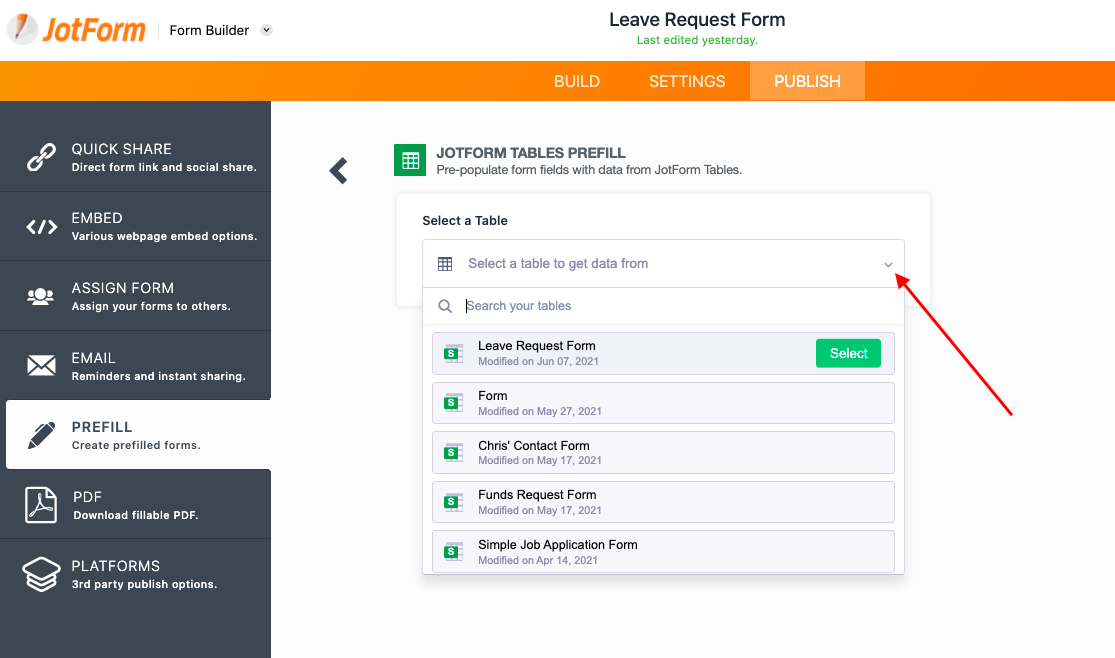
Selecting this option will display a dropdown in which you can find your previously existing tables. Upon picking a table, a second dropdown will appear allowing you to pick a specific tab from that table. Under that, you'll have the ability to match fields from your table to your form to ensure proper prefill. Some supported fields will already display as matched by default, but if you have other fields that you want to match, you'll have to add them manually, which is a very simple and straightforward process that you can see in the picture below.
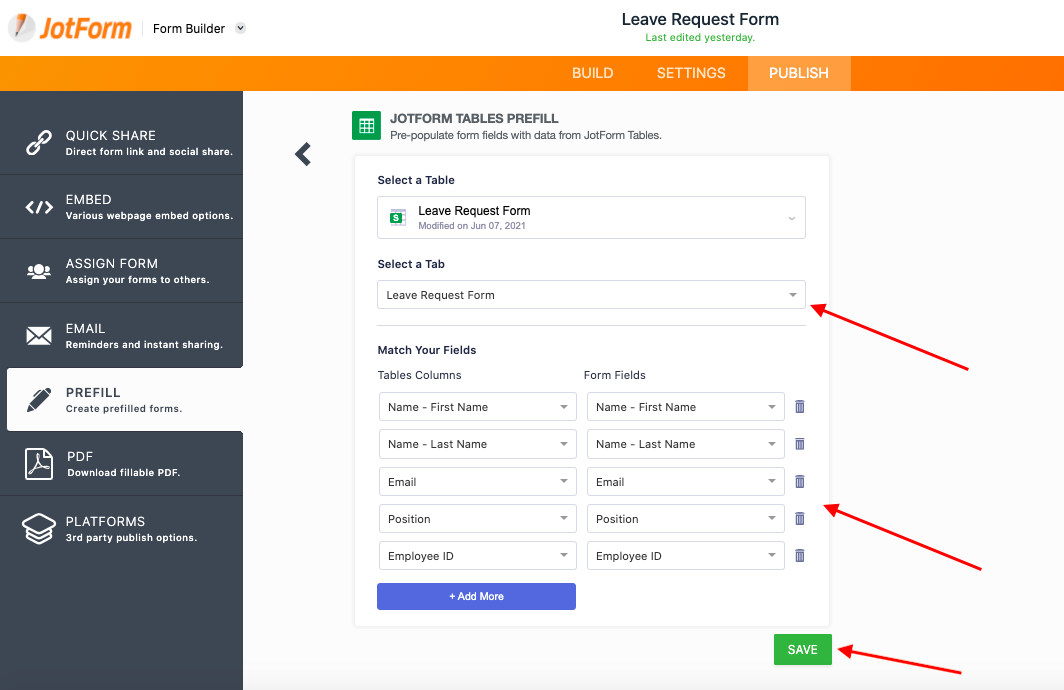
After you're content with the table, tab, and fields you've chose, be sure to hit the green "Save" button on the bottom so you don't lose your changes.
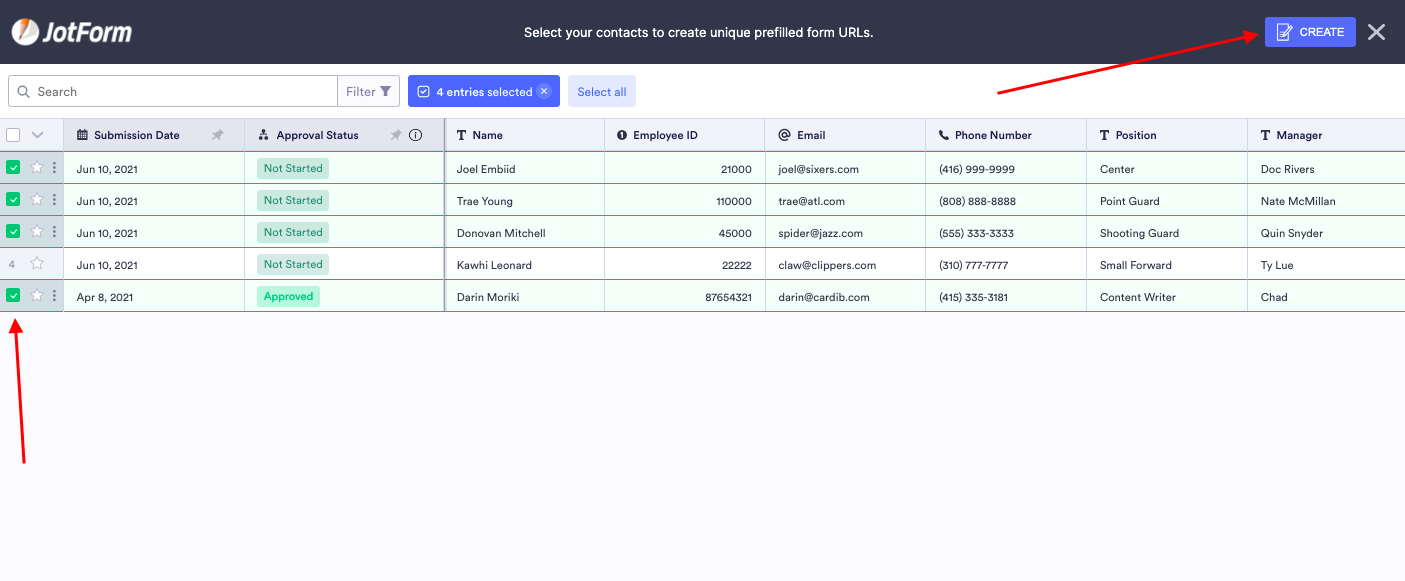
Like with manual prefill, you can create a prefilled URL for your Table Prefills that you can send to your clients. While still in the "Jotform Tables Prefill" section, click on "Create a Prefilled URL". Once again, a slightly different-looking version of your table should then appear, allowing you to check off which previous submissions you want to create a prefilled URL for. You can either check forms off individually, or use the very top checkbox to select all submissions. After selecting your submissions, click the "Create" button in the top right corner.
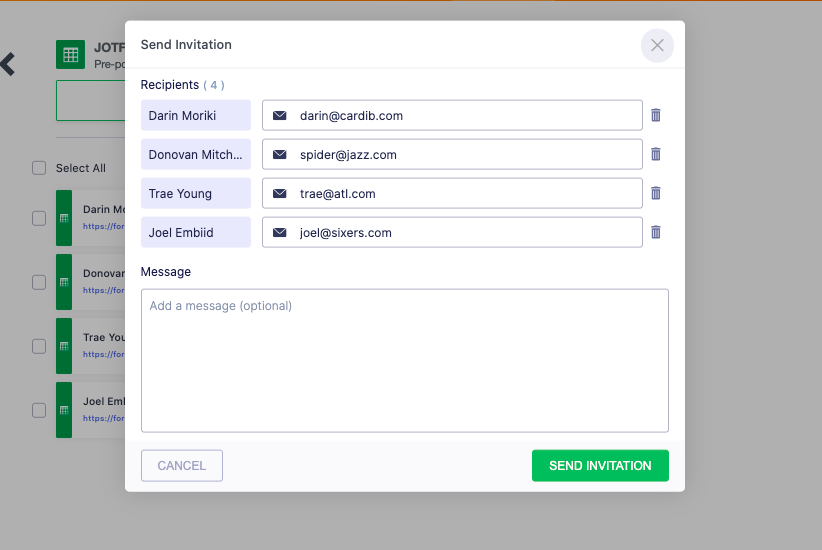
Like the manual prefill option, you can then choose to send invitations individually to access/edit the form, or you can check the "Select All" button at the top to send a mass invitation. Sending an invitation to multiple people will look something like this:
The Jotform Tables prefill is best fit for small-to-medium sized businesses that need to send recurrent forms, but it has a wide range of possibilities.
3. Form Prefill
The form prefill is actually extremely similar to the Tables prefill in terms of how it functions. However, instead of getting your prepopulated data from an existing table, you're simply selecting an existing form to pull the information from instead.
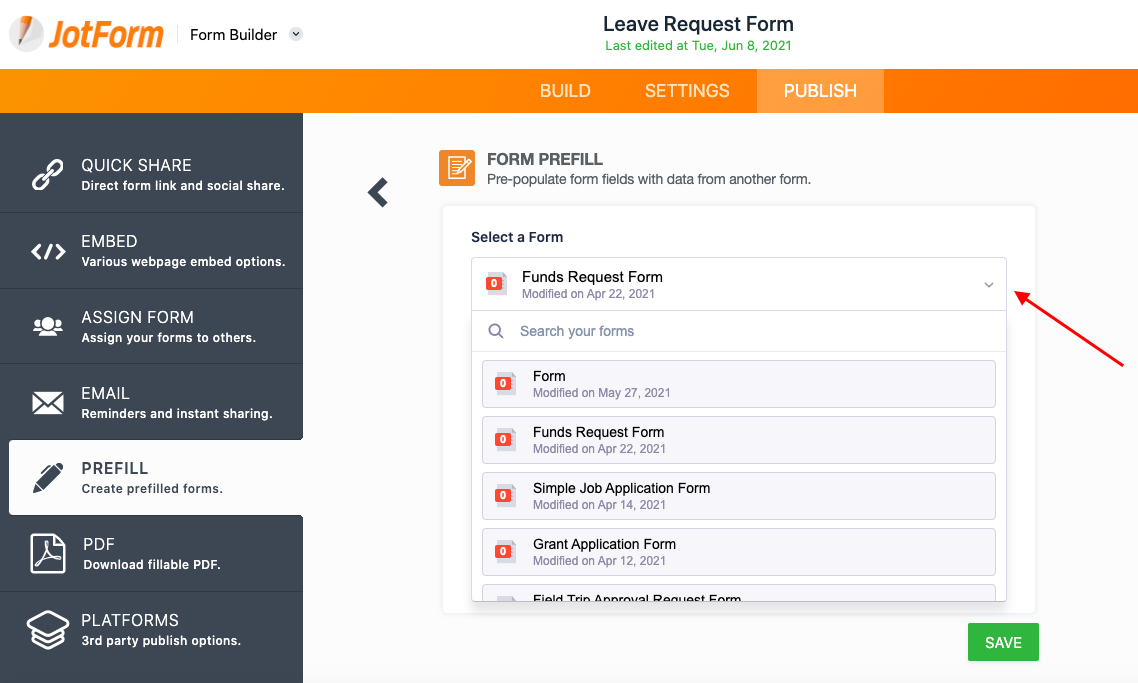
After selecting your form, you will need to go to the same process of matching fields as you would with the Tables prefill method, matching additional fields where necessary and saving your progress by using the "Save" button on the bottom.
Generating a prefilled URL actually works the exact same way as the Tables method despite this information being pulled through a form. Upon creating a new prefilled URL, you will see the main tab of a table that displays previous submissions from the form you're pulling data from. From here, proceed as if you were generating a prefilled URL using the Tables method: select the submissions you want to generate a prefilled URL for, hit the "Create" button, and then decide how you want to invite people.
The form prefill option is best for users who find themselves constantly creating new forms and having to send those forms to the same people.
4. Other Prefill Types
While each of the following prefill types have different setup processes, JotForm Prefill supports an integration with CRMs like Salesforce and HubSpot. They've also added new integrations in Prefill 2.0 with Airtable, Pipedrive, and monday.com!
You can also prefill data by uploading Microsoft Excel spreadsheets and CSV files containing existing information to Jotform and converting them into tables.
Users with a Jotform Enterprise account will have the option to prefill information using their SSO. This option is best for large organizations that need to collect and transfer mass amounts of information. You can find instructions on how to set up this prefill option here.
And don't worry mobile users - they haven't forgotten about you! All of the aforementioned prefill options are available for use in the Jotform mobile app as well.
Next Post
In this post, you learned about a multitude of ways that you can set up and take advantage of Jotform's prefill feature. With Jotform Prefill in your arsenal, your clients will find themselves spending much less time filling out forms with recurring questions, and they'll thank you for it!
If you found this helpful, please like, comment and share. Chances are, there are other people in your professional network who would benefit from this information, so don’t keep it a secret.
If you have any questions, feel free to ask. We’re here to help! Shoot an email to info@sphynxautomation.com or click here to see our form templates for sale.
Each of our forms includes a comprehensive video series on how to edit and use the form. While most of our forms are primarily used by Financial Advisors / Planners, Consultants and Attorneys there are some that are non-industry specific and the others can be customized further using our JotForm training courses. Purchasing the form will enable you to book a discounted Coaching Session with us to help you edit/modify the form for your specific needs if you need additional assistance.
This blog is written by the Sphynx Automation team to help DIYers use web-based apps.
Not a DIYer? Not a problem, click the button below to chat with us.
