Creating a JotForm - Part 1
May 12, 2021
Introduction
In the previous post we covered form building applications with a focus on our favorite, JotForm. This post, and the following three, will dive into setting up and using JotForm. If you are joining us for the first time, we covered processes and workflows in an earlier post. It is essential that you have one (or at least have a plan for one).
As a refresher to what we mean by a workflow, a typical morning routine might look like:
-
Wake up process
-
Brush teeth process
-
Shower process
-
Get dressed process
-
Breakfast process
This routine is an example of a workflow. A workflow is a simple way of defining an interconnected series of processes that are performed in a consistent sequential order. For example, you may have a New Client Workflow, Laundry Workflow, Paint Mixing Workflow, Resource/Restocking Workflow. The list goes on.
Workflows enable you and your team to establish replicable and possibly scalable set of processes. The benefits of this are two-fold:
- Efficiency for you and your team
- A consistent client experience
In the next section we will run through JotForm and the interface. It’s free for up to 5 forms. Then we will lay the foundation for our form.
Note: We are not affiliated with JotForm and no financial benefit from mentioning it. We use the tool for ourselves and for our clients and think it is a must-have application.
JotForm Overview
Set up your free account. Then, in the JotForm dashboard:
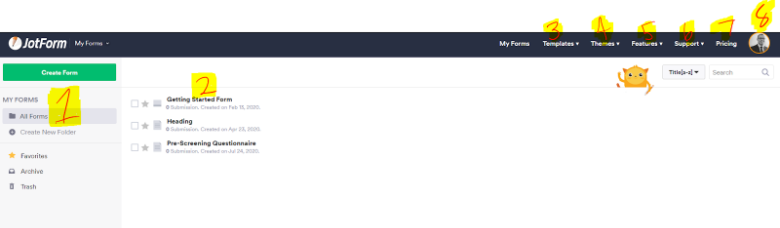
JotForm Interface
-
Panel containing Form Folders, Favorites, Archive and Trash
-
Forms within the selected folder or the main dashboard if no folder selected
-
Templates - Free or for sale
-
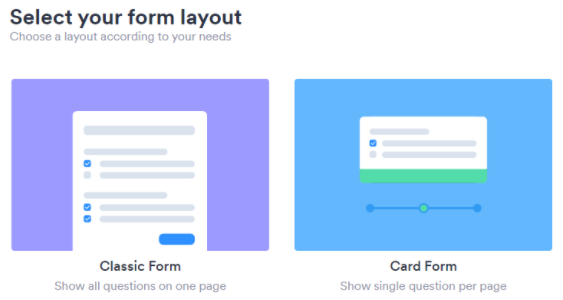
Themes for your forms - Form (page view) and Card (1 question at a time view) Themes
-
Features regarding HIPAA compliance, Mobile Forms, Secure Forms, Form Payments, etc.
-
Support / Help
-
Your Account
- Plan Information
- Account Settings

- Account Settings
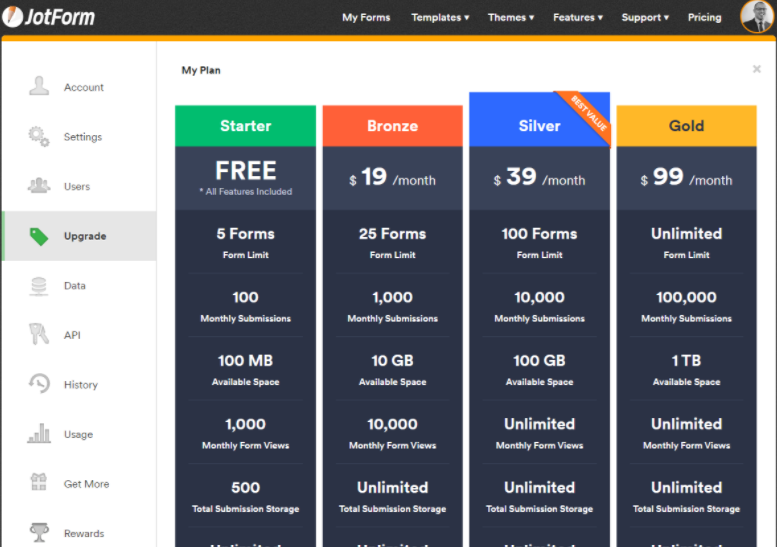
- Main Screen - The most important sections are the “Upgrade” “History” sections.
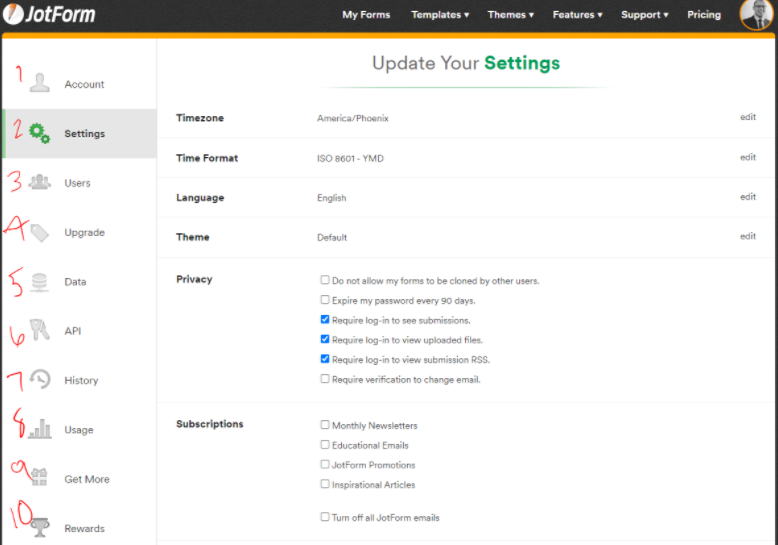
- Upgrade Account section - Displays all of the features included within each tier. If you ever forget what your account features are, this is where you would check.
-
Historical section - You can check form creations, edits, deletions and more. You can also verify that emails are being sent to the intended recipients upon submission.
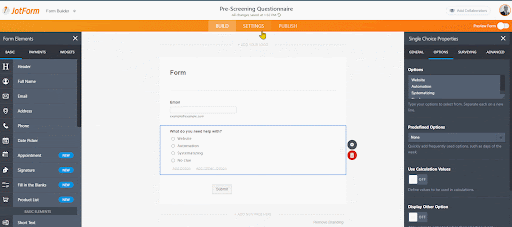
Form Interface
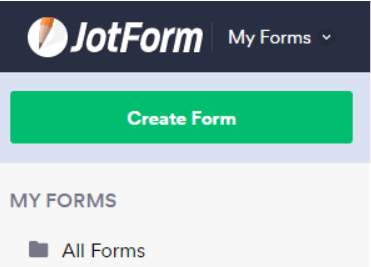
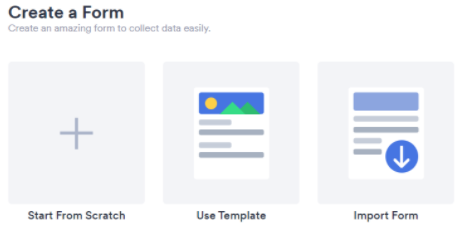
1. Click “create form” on the top left.
2. Select the appropriate option. For templates, check out our library.
3. Select your layout preference.
4. Title your form. (It’s alright if this changes. This just a quick interface runthrough.)
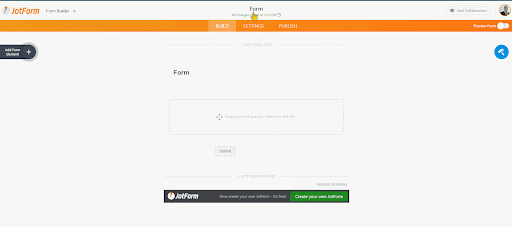
5. Add fields to the form. Adding fields is done by dragging and dropping the desired field from the left hand “Form Elements” menu.
6. Navigate to the Autoresponder emails.
A. Select “Settings” on the top menu
B. Click “Emails.” Green emails are form-filling party notifications and orange emails are account holder notifications.
Laying the Foundation of Your Form
You now have a rough idea of how the form builder works. Next, we will move on to actually building the form.
First things first, begin with an outline. An outline is important for the following reasons:
- Efficiency - a foundation will allow you and your team to quickly implement the form once you all agree on the structure, flow and purpose of the form.
- Focus - a foundation enables you to identify redundant questions or information requests. It will also enable you and your team to create a cohesive form that will improve the client experience and data-gathering process.
- Troubleshooting - establishing a foundation before jumping into implementation will allow you to identify errors when the form is finally implemented. This will make the testing process and troubleshooting, much more efficient.
Your form outline does not need to be identical to ours. The outline is a reference to cover some of the ideas I will introduce and key items you should be aware of.
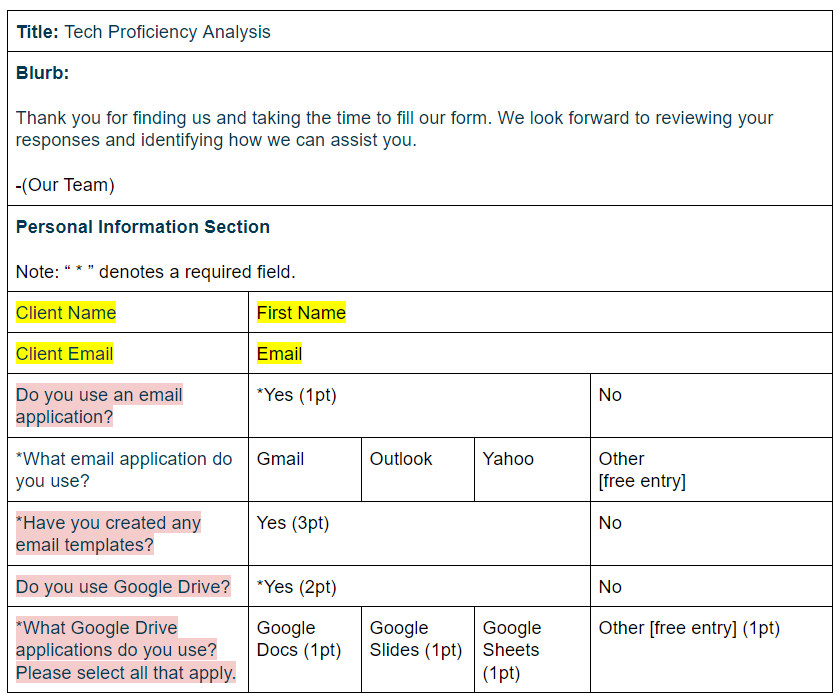
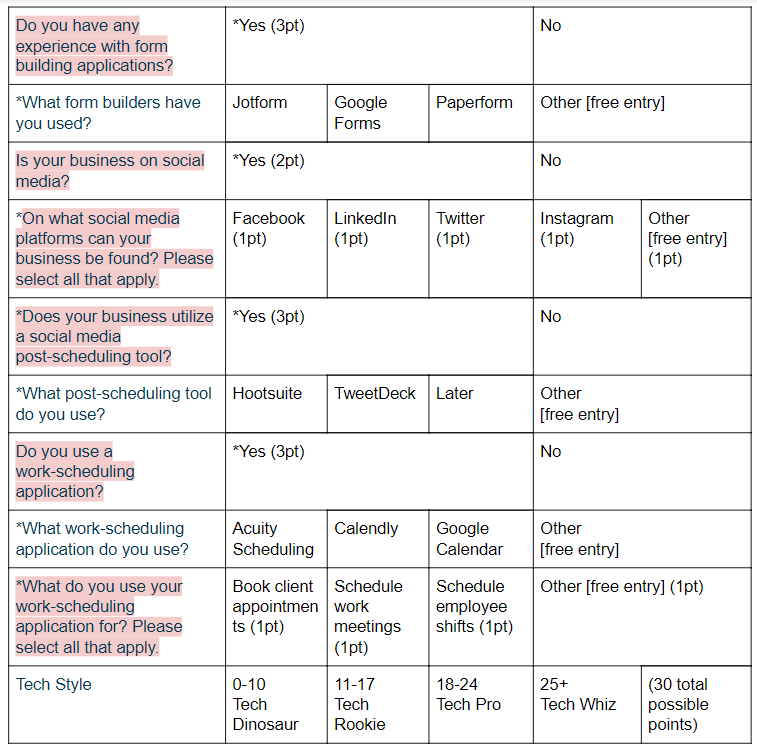
Example form: Tech Proficiency Analysis Outline
- Open a Google Doc, Google Sheet, Word Document or Excel Sheet (the simplest tool you can think of for outlining documents).
- Add a table with multiple rows and columns. You will most likely merge key section titles/ headings and chunks of text.
- Add a title section.
- Identify the essential data you need to gather. Always include a Name and Email at the top of your form. Form builders need to know who to send autoresponders to and how to address the form-filling party.
Identify mandatory information that absolutely needs to be collected to help you make the most of the data you collect.
In this case, we are building a form that identifies how proficient someone is with technology. We added a scoring metric that will make it easy for us to say, “This person knows what they’re doing,” or “Yikes,” when the form is submitted. Additionally, the screening questions are also used to hide fields that have no relevance until we know more information. Because of the scoring metric, a majority of our screening fields are required.
For example: The question “Do you use an email application?” is a screening question. It requires a response. If a person selects yes, they will receive 1 point on their proficiency score. Also, selecting “Yes” will enable the filling party to answer more precise, related questions such as “What email application do you use?”
In this example, if the filling party selects “No,” they are not assigned a point and the follow up questions are not asked since they hold no relevance. This is a best practice for keeping forms lean, clean and simple.
Up Next
The next post will dive into setting up the form in JotForm. If you found this helpful, like, comment and share. Chances are there are many people in your professional network that would benefit from this.
Also, feel free to think of creative uses for forms: you could design a scoring calculator for your children's efficiency and possibly create a Weekly Allowance Justification Form or a Total Screen Time Justification Form. Those are terrible, authoritative examples, but the possibilities are endless.
If you have any questions, feel free to ask. We’re here to help! Shoot an email to info@sphynxautomation.com or click here to see our form templates for sale.
Each of our forms includes a comprehensive video series on how to edit and use the form. For now, our forms are primarily used by Financial Advisors / Planners, Consultants and Attorneys. Purchasing the form will enable you to book a discounted Coaching Session with us to help you edit/modify the form for your specific needs if you need additional assistance.
This blog is written by the Sphynx Automation team to help DIYers use web-based apps.
Not a DIYer? Not a problem, click the button below to chat with us.
