Creating a JotForm - Part 2
May 26, 2021
Introduction
In the last post, we laid the foundation for our sample form. We now have a viable rough draft that the team has agreed on. This post will cover the process of implementing your approved outline in JotForm. Again, your form does not have to be exactly like the one in our example. It’s just there as a reference point.
If you have any questions, feel free to ask. We’re here to help!
Not impressed by JotForm’s template library? That’s alright, we weren’t either, so we created our own. Click here to see the templates.
Each of our forms includes a comprehensive video series on how to edit and use the form. While most of our forms are primarily used by Financial Advisors / Planners, Consultants and Attorneys there are some that are non-industry specific and the others can be customized further using our JotForm training courses. Purchasing the form will enable you to book a discounted Coaching Session with us to help you edit/modify the form for your specific needs if you need additional assistance.
Create the Questionnaire in JotForm
We’re ready to start building out the draft we created in the prior post. Here’s a step-by-step guide on how we go about building them.
1. Add a first name field, an email field, and a single choice field to use for scoring.
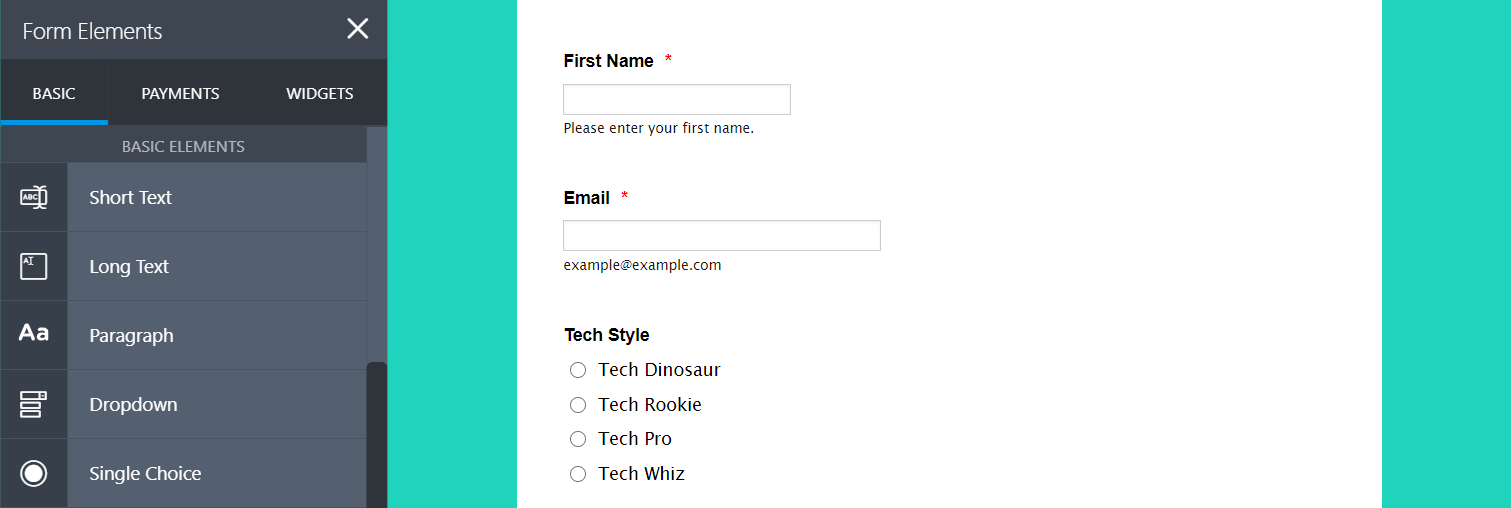
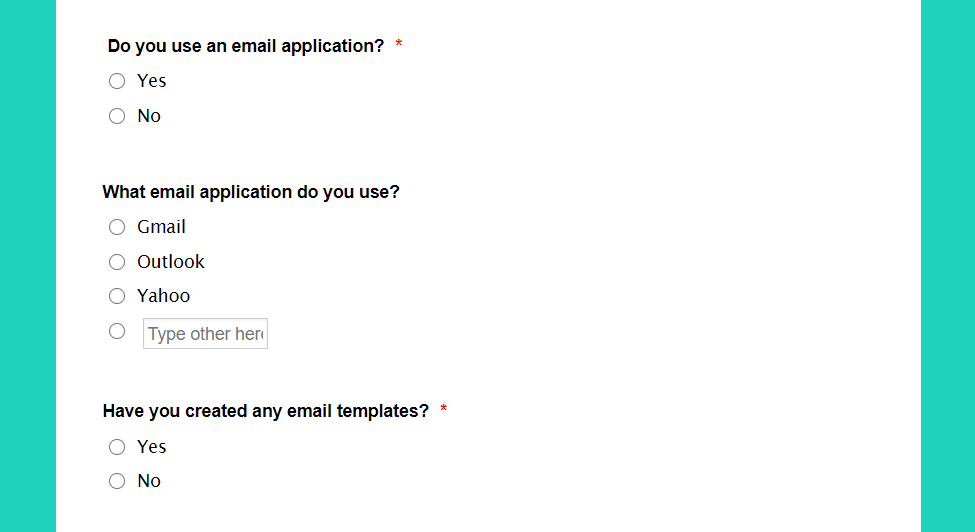
2. Add questions from document using single choice, multiple choice, or text entry fields.
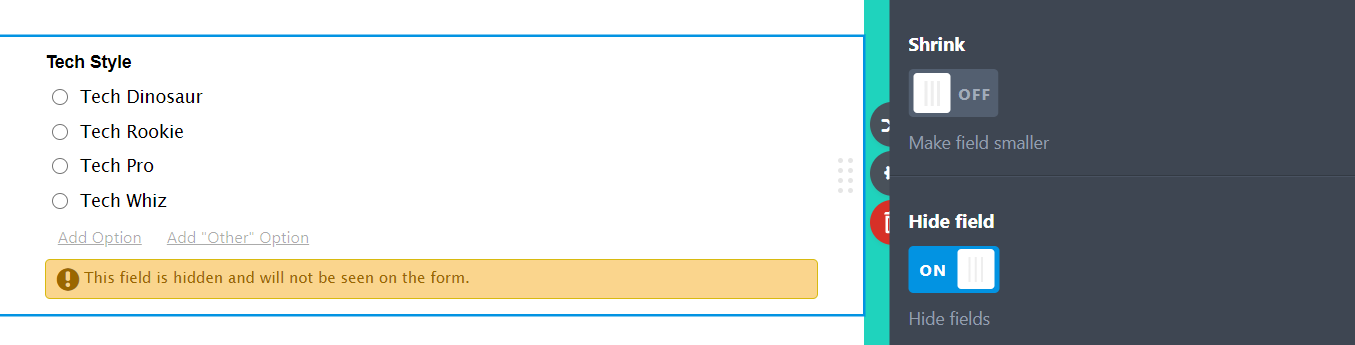
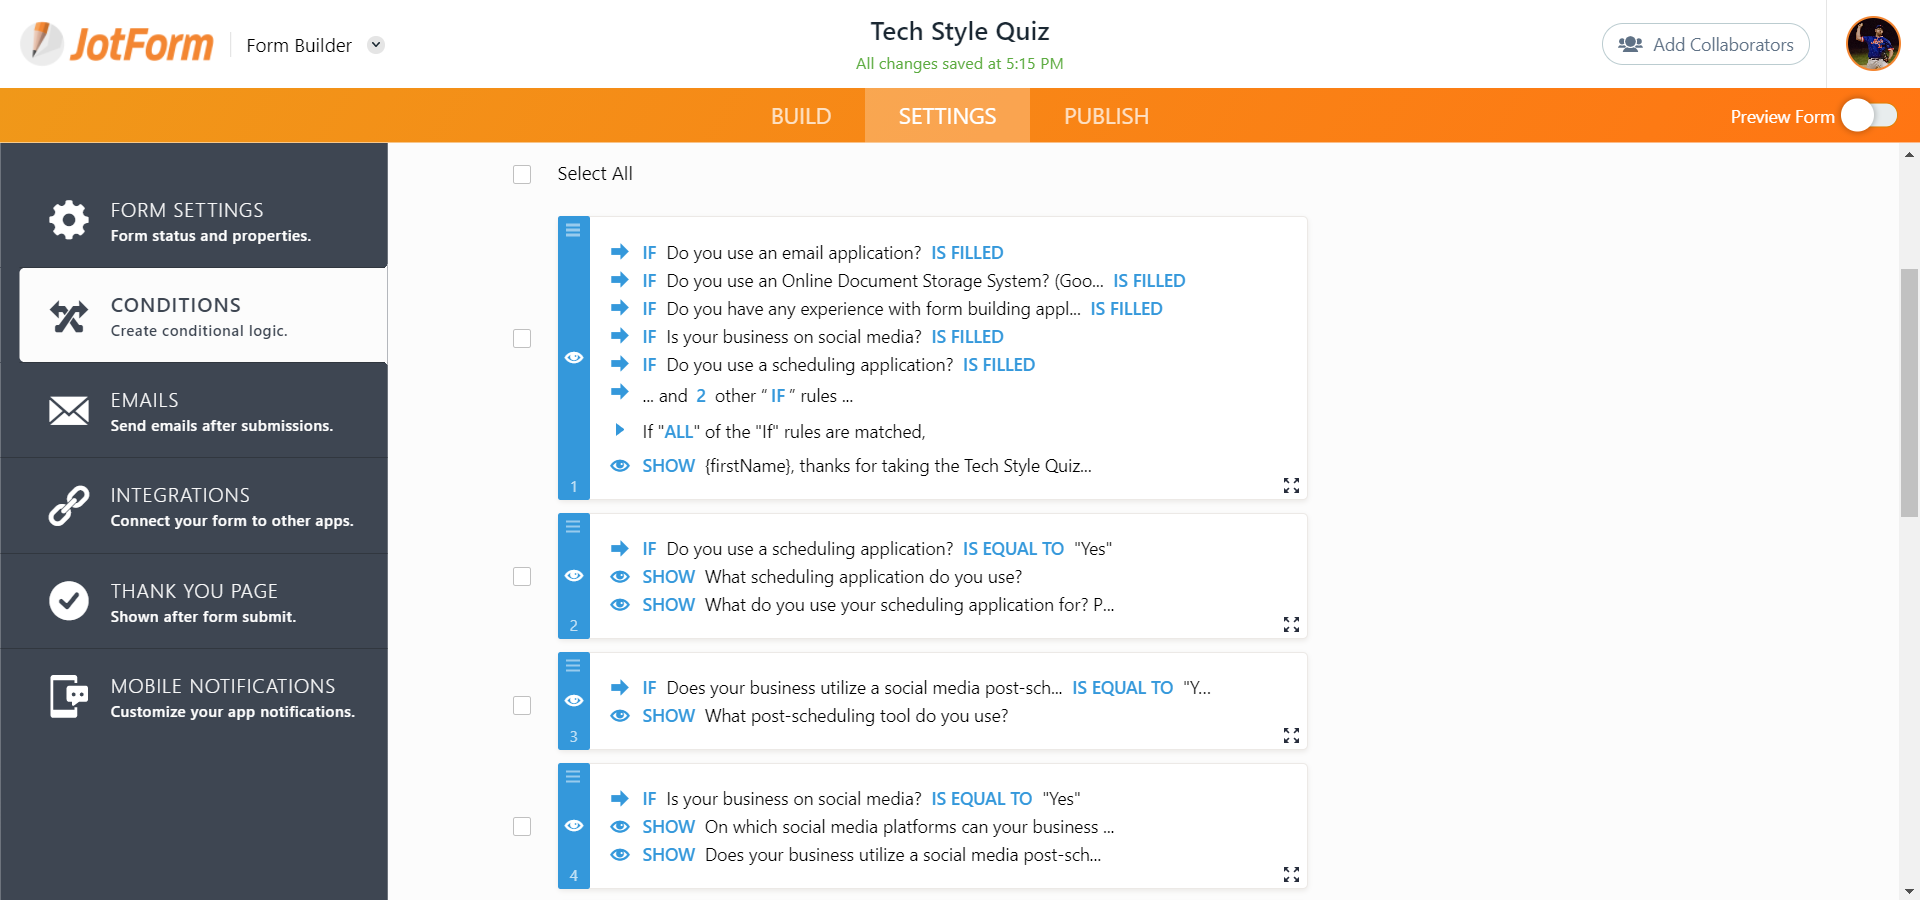
3. Hide the single-choice scoring field from step 1, as well as any questions that you do not want to show up by default. To do this, select a question and go to Properties > Advanced > Hide Field.
4. Set conditional logic to make a hidden question appear when triggered by a specific answer to its parent question.
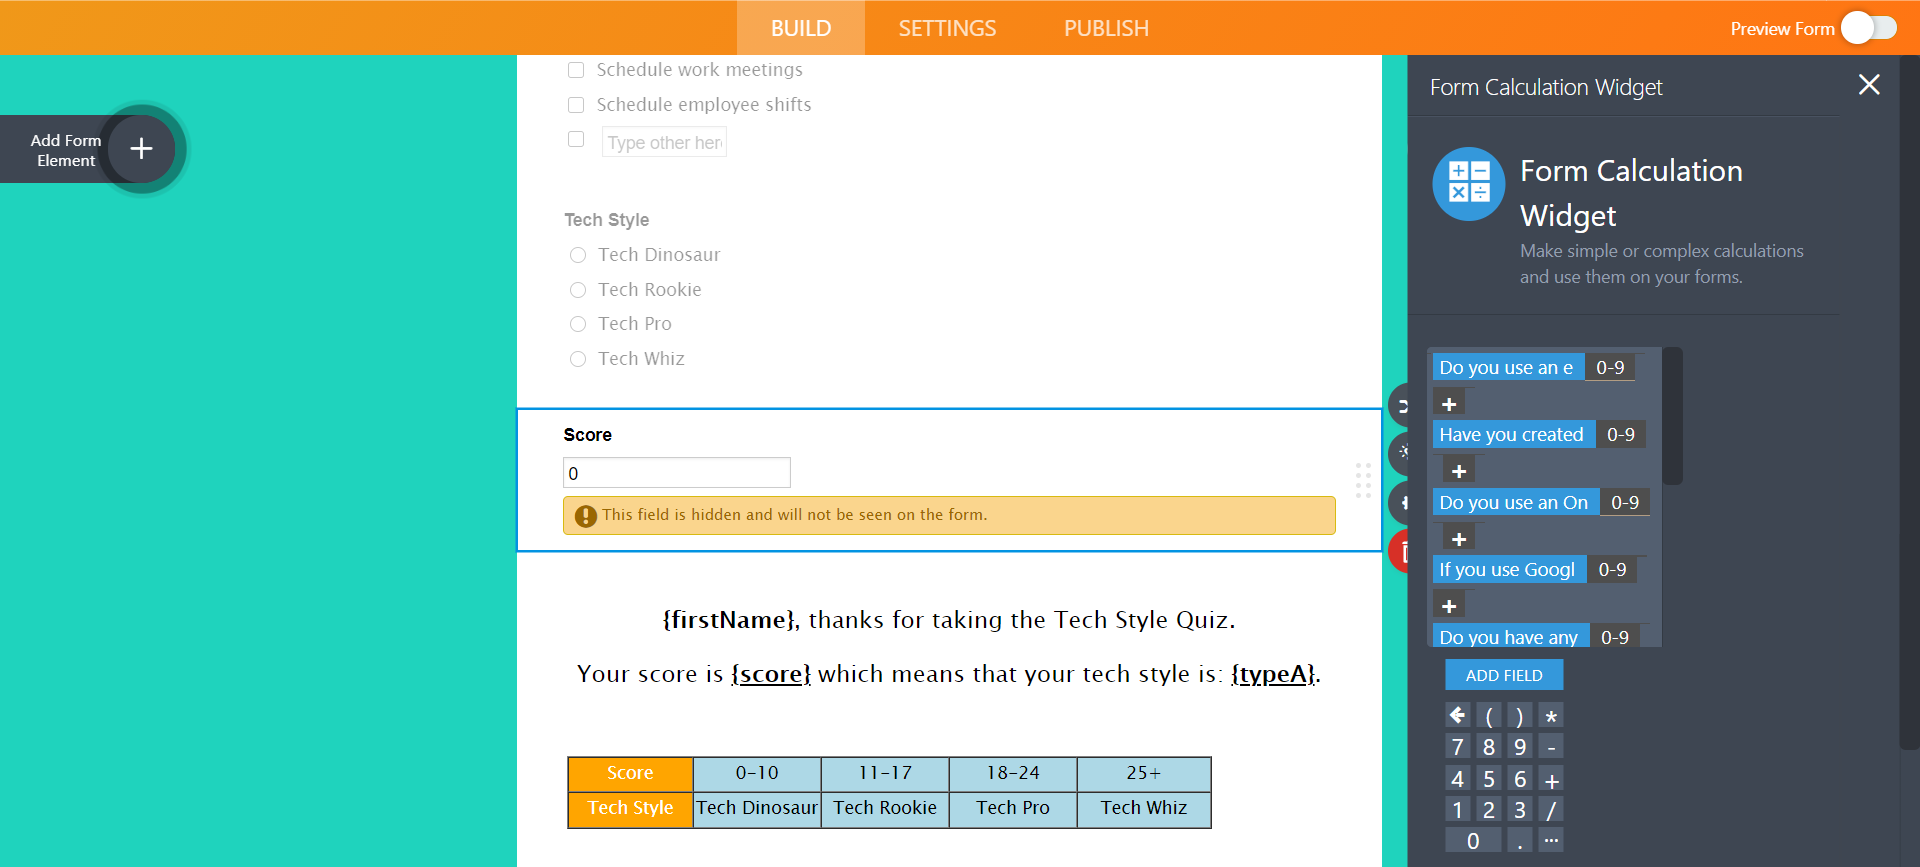
5. Add a form calculator from the widgets tab and ensure that it is hidden.

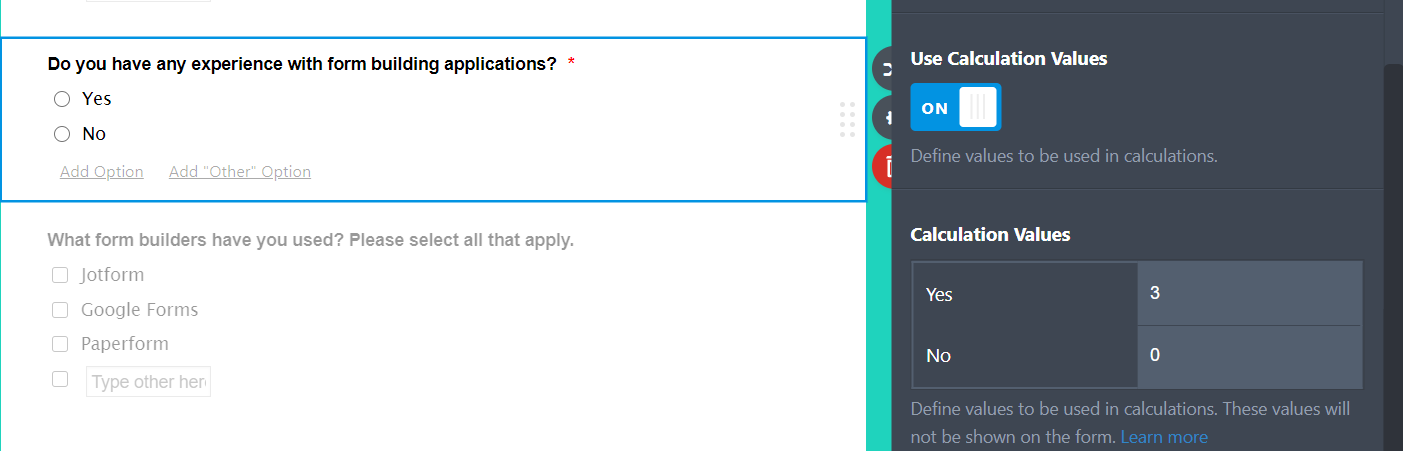
6. Set score values for each question by going to Properties > Options > Use Calculation Values.
7. Set conditional logic for form calculator, using names from single-choice scoring field.
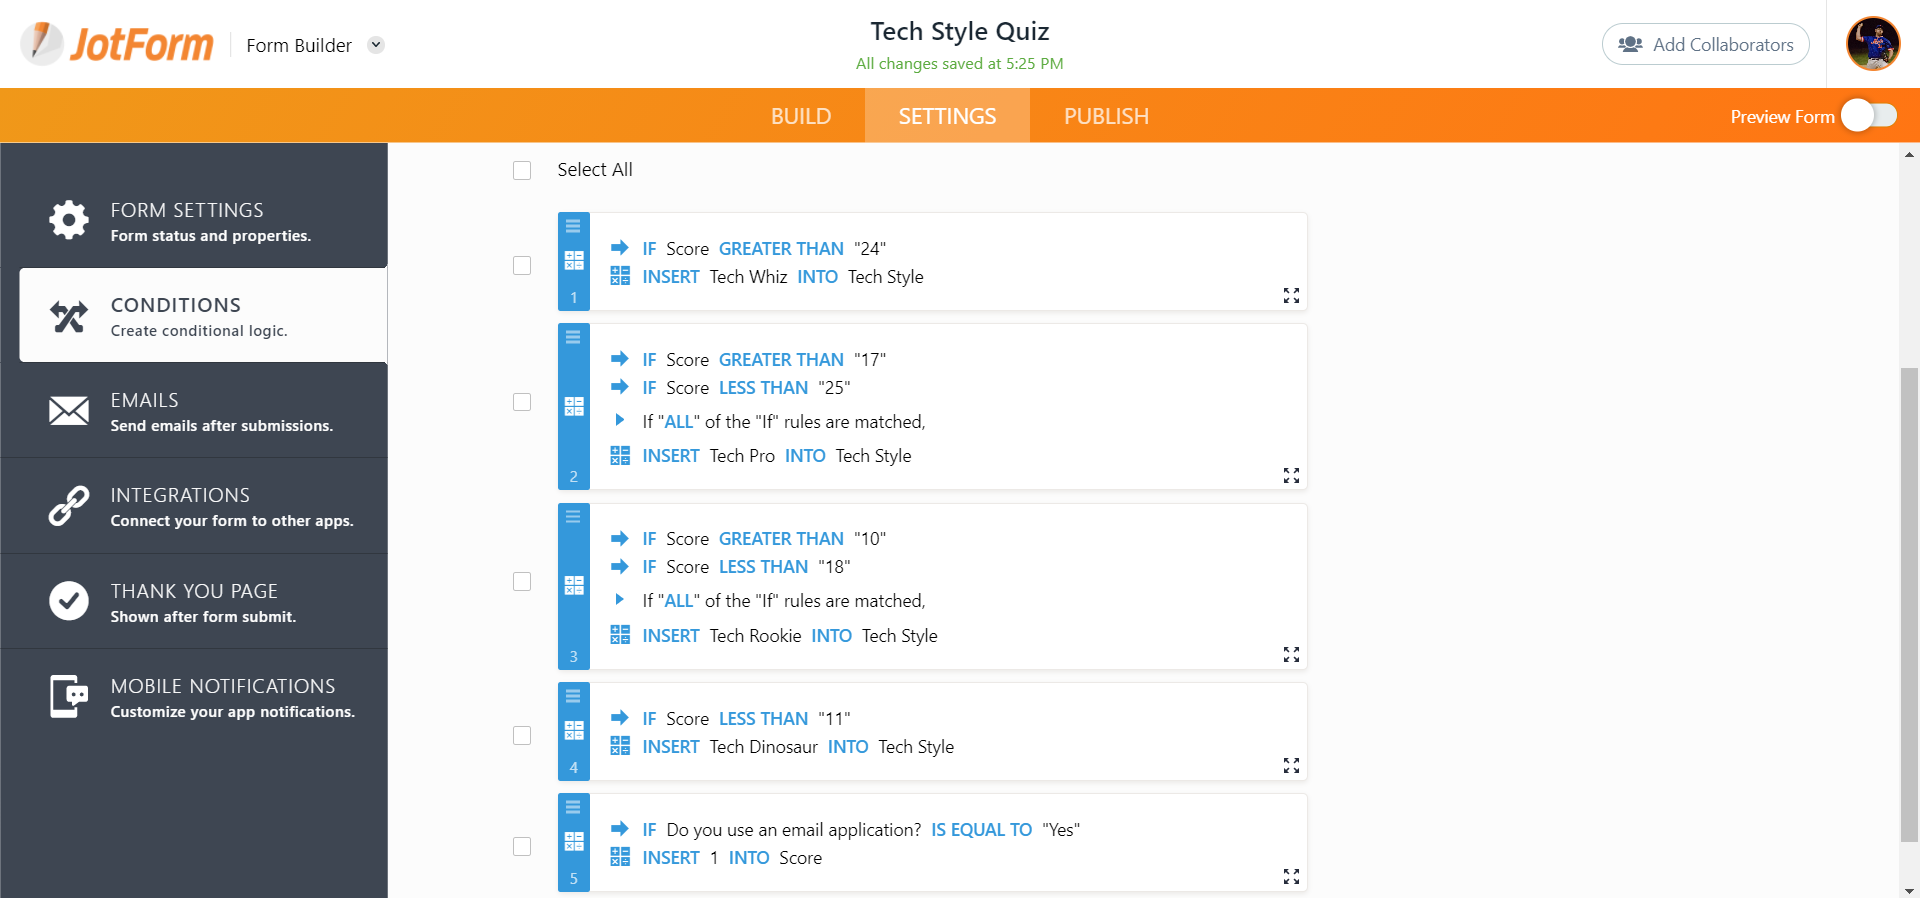
8. Add question scores together within the form calculator.
9. Configure your autoresponder emails.
A. Click “Settings” on the top menu in the orange band.
B. In the “Settings” window, select “Email”.
A. Click “Settings” on the top menu in the orange band.
B. In the “Settings” window, select “Email”.
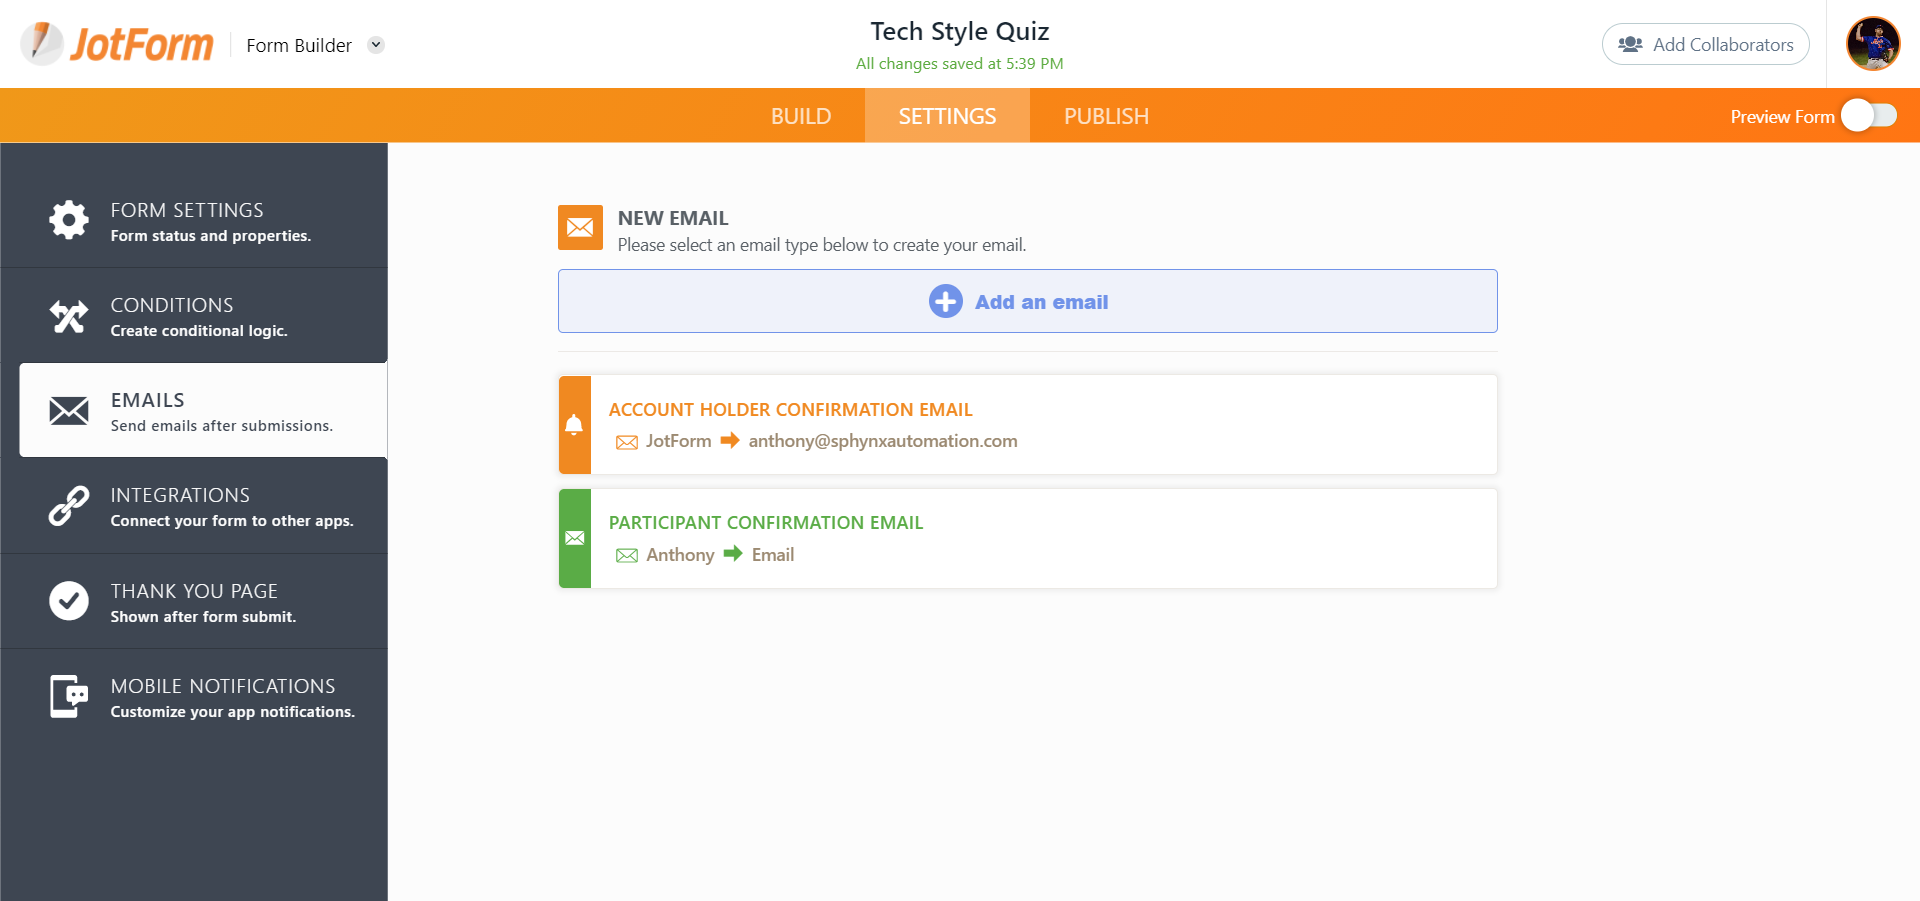
C. In the “Email” Screen, select the email to be edited
*Note: Orange emails are for the account holder. Green emails are client-facing emails/ filling-party notifications.
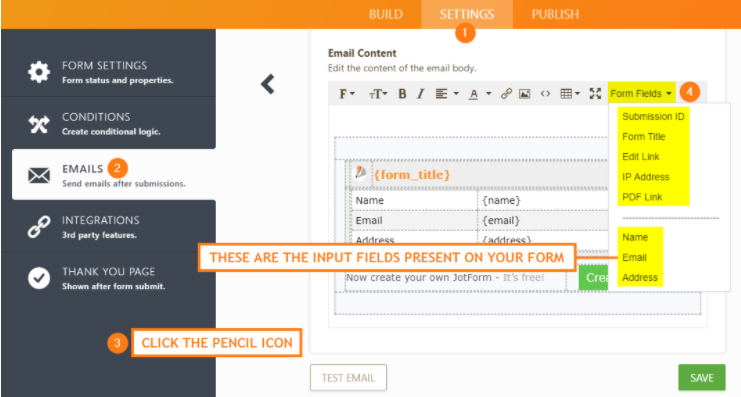
D. Edit the email text as needed. The example below shows the account holder email. The email should include basic information on who submitted the form. You can use the merge tags to pull specific fields from the form. Click here for a step-by-step guide on how to setup an autoresponder email.
E. Add merge tags where applicable. (Image from Jotform guide regarding form fields)
*Note: Orange emails are for the account holder. Green emails are client-facing emails/ filling-party notifications.
D. Edit the email text as needed. The example below shows the account holder email. The email should include basic information on who submitted the form. You can use the merge tags to pull specific fields from the form. Click here for a step-by-step guide on how to setup an autoresponder email.
E. Add merge tags where applicable. (Image from Jotform guide regarding form fields)
Note: For client-facing emails, a best practice is to add your signature line with links to schedule a meeting or to resources corresponding to the content of the form.
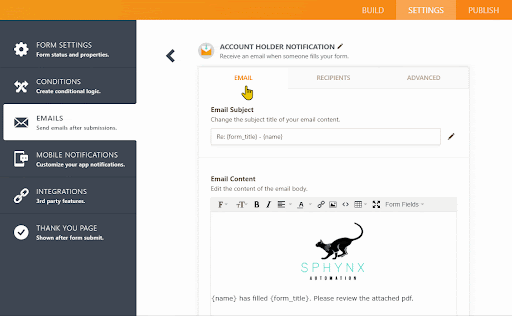
10. Attach the submission pdf to your email.
A. On the email menu, select “Advanced” and toggle the “PDF Attachment” setting to “Yes”.
A. On the email menu, select “Advanced” and toggle the “PDF Attachment” setting to “Yes”.
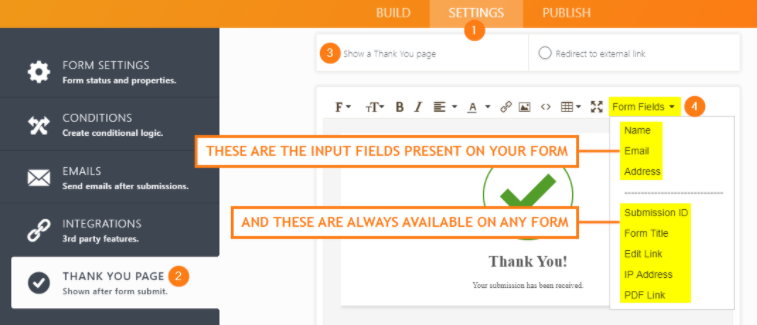
11. Update the Thank You Page. This is the page that Jotform will show when the form is submitted.
A. In the “Settings” screen, select “Thank You Page” on the bottom left hand corner. The editing process is similar to editing the email notifications. (Image from Jotform guide regarding form fields)
A. In the “Settings” screen, select “Thank You Page” on the bottom left hand corner. The editing process is similar to editing the email notifications. (Image from Jotform guide regarding form fields)
12. Preview and test your form.
Testing the Form
Now that you’ve done the hard work of visualizing, drafting and creating the form, it’s time to test it. After all, what good is your beautiful form if it doesn’t work operationally?
-
On the top right of your form, under the account image, toggle the “Preview” button. This will put the form in preview mode.

-
Important!
- Copy the URL in the text field on the far left of the orange menu.

- Open an Incognito Window or a different Internet browser. Here’s a guide on how to do that.
- Paste your URL into the Incognito Window’s address field.

- Fill and submit your test in the Incognito Window.
Always test every form you create in an incognito window. JotForm is great in many ways, but the preview feature may not be an accurate representation of what the form-filling party sees. The only way to verify the client experience is to fill the form in a manner where you are not signed in to JotForm.
Up Next
The next post will conclude the JotForm Setup Guide. We will walk through integrating your form with other applications. If you found this helpful, like, comment and share. Chances are there are many people in your professional network that would benefit from this.
Also feel free to think of creative uses for forms: you could potentially design a scoring calculator for your children's efficiency and possibly create a Weekly Allowance Justification Form or a Total Screen Time Justification Form. Those are terrible, authoritative examples, but the possibilities are endless.
If you have any questions, feel free to ask. We’re here to help! Shoot an email to info@sphynxautomation.com or click here to see our form templates for sale.
Each of our forms includes a comprehensive video series on how to edit and use the form. For now, our forms are primarily used by Financial Advisors / Planners, Consultants and Attorneys. Purchasing the form will enable you to book a discounted Coaching Session with us to help you edit/modify the form for your specific needs if you need additional assistance.
This blog is written by the Sphynx Automation team to help DIYers use web-based apps.
Not a DIYer? Not a problem, click the button below to chat with us.
